Showing posts with label Cricut Art Philosophy. Show all posts

Thursday, August 4, 2016

Happy Times Happy Birthday

One of the things I'm most excited about in the new CTMH catalog are the half size page protectors (6 x 12 vs. 12 x 12). I like to scrapbook a lot of pictures of an event onto a two page layout. I either will add a whole other layout or I'll use Flip Flaps to add more photos. Being able to simply include a half page of extra photos gives even more versatility and I am over the moon to have this option. I'm calling them half page pocket protectors but officially they are Memory Protectors™ Pocket Plus™  and you can find them here. There are a variety so you can choose whether you want to include 4 x 6 photos in a portrait or landscape orientation OR if you want to include 3 x 4 photos in either orientation. Love them!

I used Memory Protectors™ Pocket Plus™ Design 1 and here's the product description from the website: 
Add extra photos or artwork to your layouts with these Memory Protectors™, which feature a full gutter so they lie flat in post-bound albums.
10 protectors – 6" × 12" with 3 horizontal 4" × 6" pockets.

You saw that about the full gutter, right? Wahoo! You can use the in post bound albums, no problem!

So of course the first thing I created when I got my order of new stuff was a double page scrapbook layout with a 6 x 12 page protector in the middle.

Here's the left side of my double layout. The balloons and "Happy Birthday," are cut with the CTMH Artiste Cricut cartridge and the tag is from Art Philosophy, both now retired. I used the Happy Times paper pack which was a special in May. Do you see the hinges on the side of the paper mat? Aren't you proud of me for using them? Those are really old!

I included some envelopes, cards, and stickers from the retired My Crush In the Pink Assortment on the right side of my double page layout. 

Here are both pages with the 6" x 12" page protector in the middle. 

Another view with both pages and the half sized page protector flipped over. I love being able to include more pictures in my layouts without crowding them in.


 So you can probably tell that I tried to really incorporate some of the NUMEROUS embellishments which I already own. I've been organizing this summer and even though I'm not finished with my scrapbook organization, it's so much easier to see what I have and can use. Does anyone remember brads? I have so many! And so many flowers! Here's a close-up of some of the details on the first page.

Even though I used a lot of older supplies which weren't all in one coordinated set, I think they meshed pretty well. Let me know what you think!
Pin It

Sunday, May 10, 2015

Taste of Summer Mother's Day Tri-Fold Card

Happy Mother's Day to all the moms out there! 

I'm sharing the card I made for my mom using the Taste of Summer paper pack and stamp set, only available during the month of May in honor of National Scrapbooking month. I love Tri-Fold Shutter cards because you can really embellish and make them pop!

Here's how it looks closed. I cut out the "m's" and circles using my CTMH Art Philosophy Cricut Cartridge. I used Juniper and Cranberry inks to stamp my strawberries and sentiments.

When you open it, you can see all the panels. I used the CTMH Artiste Cricut Cartridge to cut my little label where I stamped "Happy Mother's Day" (from the Just To Say Cricut Collection stamp set).

You can see some more of the dimension in this view.

And here's one more open view as it's standing up. The red ribbon is our retired grosgrain Cranberry ribbon and the red cardstock is the Cranberry from the Paper Fundamentals Adventure Assortment. The base of my card is a sheet of Smoothie cardstock.

You can do a Google search for a Tri-fold Shutter card but the measurements I used for my card base are 12" x 5.5" and I scored lines using my scoring blade in my paper trimmer at 2", 4", 8", and 10" as I held the paper horizontally. I cut from 1.5" measuring down from the top edge and up from the bottom edge going from the 2" mark to the 10" mark. I liked this video on YouTube to get a better idea of how to make this: https://www.youtube.com/watch?v=oeaG4wvdZbw
Here's another video I looked at: https://www.youtube.com/watch?v=LWrnqMoaCnQ
Pin It

Sunday, March 15, 2015

Snowhaven Layout

Now that we have some beautiful binder albums, it's easier than before for me to add my layouts directly to my album and move my layouts around. I've always liked including different types of layouts (divided page protectors along with the 12 x 12 page protectors) in my album and now I can see how it will look right away. I worked on a double layout today which has a regular undivided page protector on the left and a divided page protector on the right. Sorry for the quality of the last two photos. They have a glare from light reflecting off of the page protectors but I wanted to show you how they looked in the album.

 Right side  

 Left side (divided)

The layouts side by side

I decided to use the divided page protector on the right as opposed to doing a large layout because I had photos from two different events. While I wanted to include the second event in my album, my pictures were not of great quality (took them from far away with my phone in a poorly lit room and then enlarged them) and I only ended up with two okay photos. Including them along with the other photos just seemed to make more sense than focusing on them in a whole other layout. I still wanted my layouts to look a little cohesive so I used the same paper pack, Snowhaven, one of my favorites and tried to repeat some elements, such as they way I did my journaling in a list format and in strips. The pocket card was cut from the Artfully Sent Cricut cartridge and the snowflakes were cut from the Art Philosophy Cricut cartridge. I also repeated using some Oceanside Sequins (these will be available starting April 1st) as bullets for my journaling list and as the centers of some of the snowflakes.

Here's a close up of the journaling block on the right with the snowflake and sequin detail.

Pin It

Tuesday, March 3, 2015

Heartstrings Layout

Did you know that the Heartstrings and Hopscotch papers will no longer be available after March? We will have a new Seasonal Expressions catalog which you can order from beginning on April 1st with new papers and other amazing products but this month will be your last chance to purchase these two wonderful paper packs. I have to say, Heartstrings has become one of my favorites! Here's a layout I made with the Heartstrings paper pack,  Heartstrings Complements, the Art Philosophy Cricut cartridge and the Artbooking Cricut cartridge.


Pin It

Thursday, February 12, 2015

Another Valentine's Day Card using Artiste and Art Philosophy

I actually made the front of this card and send it out today! That never happens with me. It should arrive on time. Woohoo! I even included some cute heart shaped sugar cookies. I hope my friend likes her package. Cricut made it easy once again. I just cut out a bunch of banner shapes and used what seemed to look good together. The inside is the same pop up heart I used earlier here.

Pin It

Wednesday, February 4, 2015

Floral Condolence Card

Here's a condolence card I made with my latest favorite go to overlay card design from the Artfully Sent Cricut cartridge (shift, sleeve, key e) cut in Colonial White. The flowers are different sizes of one design from the Art Philosophy Cricrut cartridge. I wanted the flowers to be relatively flat so I could mail the card but I still wanted them to have a bit of dimension, so I just adhered them in the middles and bent up the petals a bit. The Background and Texture paper is from the Seaside paper pack. The inside sentiment is also from the Artfully Sent Cricut cartridge (same key as the overlay card).  


Pin It

Saturday, January 31, 2015

Overlay Card

I've been enjoying making this style of card lately...3-D flowers on top of intricately cut out overlay cards (thanks to the Cricut Artfully Sent and Art Philosophy cartridges).


Pin It

Sunday, January 4, 2015

Treasures of the Heart

The little envelope which says, "Treasures from the Heart," is from the My Crush™ Besties Assortment, a collection of journaling cards, stickers, and mini envelopes that go well with the My Crush books but, as you see here, can go on any paper crafted product you like! I used one on my card that I posted yesterday. I used the Artiste Cricut cartridge to cut out the card and the hearts from the Heartstrings papers and the Art Philosophy cartridge to cut out the roses. I also included a little puffy heart sticker from the Chalk It Up Assortment.


 Here's the card opened. I added the teal paper to the square side. I think I will add a light colored piece of cardstock or other journaling card to write a message on.

Pin It

Saturday, January 3, 2015

3-D Flower All Occasion Card

Here's an all-occasion card I made using the Art Philosophy Cricut cartridge, the Artiste Cricut cartridge and a variety of papers including our new Heartstrings, Brushed, and the retired Babycakes, as well as a journaling card (the yellow diagonal striped part) from the My Crush™ Besties Assortment. I'm learning to mix and match!


Pin It

Friday, November 15, 2013

Artbooking Made Easy: Cross-Cartridge Collaboration (S01E11)

Here are some more great ideas for using the Cricut Artbooking cartridge and on combining cuts from Art Philosophy, Artiste, and Artbooking.
Pin It

Sunday, November 10, 2013

Clearly the Best: Wacky Washi (S02E04)

This is a fun technique using Washi tape in the negative space of a cut out design. What a quick and pretty card!

Pin It

Sunday, February 10, 2013

Gifts: Homemade Sugar Scrubs

In December, my daughter and I worked on some handmade/homemade gifts for her teachers, Girl Scout leaders, and some friends. The classes were collecting money to give the teachers gift cards (it's three classes which are team taught) but she also wanted to give something from herself to make it a bit more personal.
 
We found some recipes for sugar scrubs online and tweaked them to fit what we had and could get. There are so many recipes online but here's a link to get you started: http://dearcrissy.com/homemade-sugar-scrub-recipes/
 
Here's what we used:
1 cup of brown sugar
1 cup of white sugar
1/4 cup of coconut oil (this is a solid oil)
1-2 tsp. of almond extract
1 tablespoon of Vitamin E oil
We also added a bit of grapeseed oil (just eyeballed it)
 
We found all of these ingredients at Target. You can substitute different oils though and tweak the ingredients to make it your own. The almond extract made it smell really nice but you could substitute with whichever fragrance you prefer.

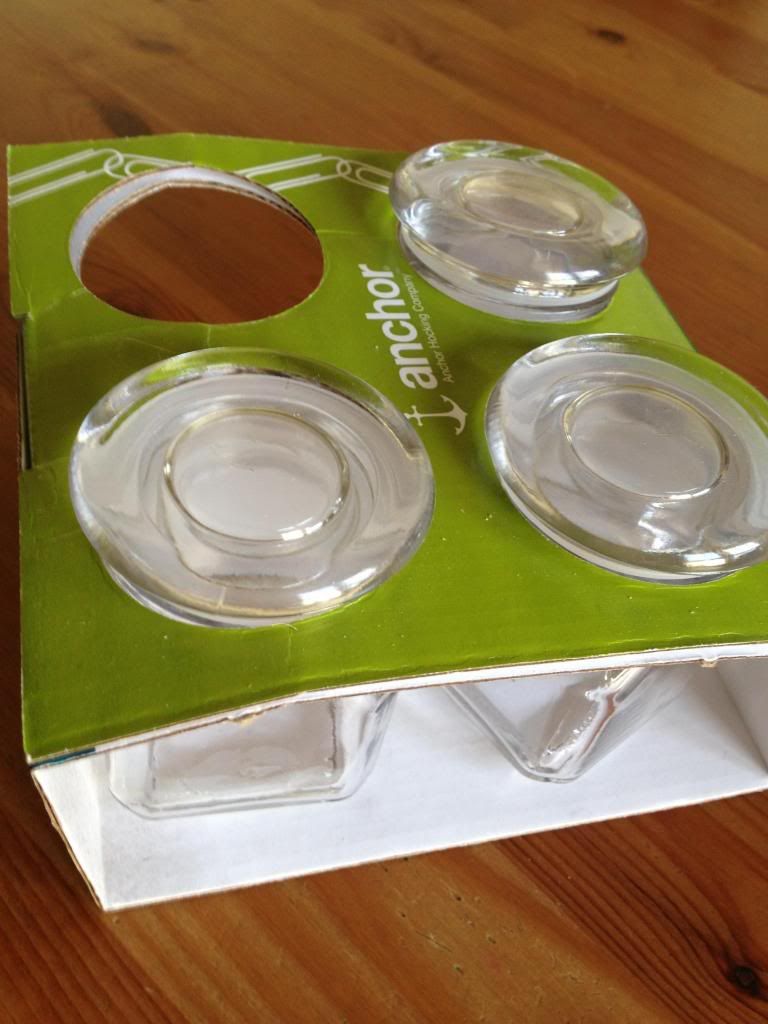
I found these little glass jars at Walmart.
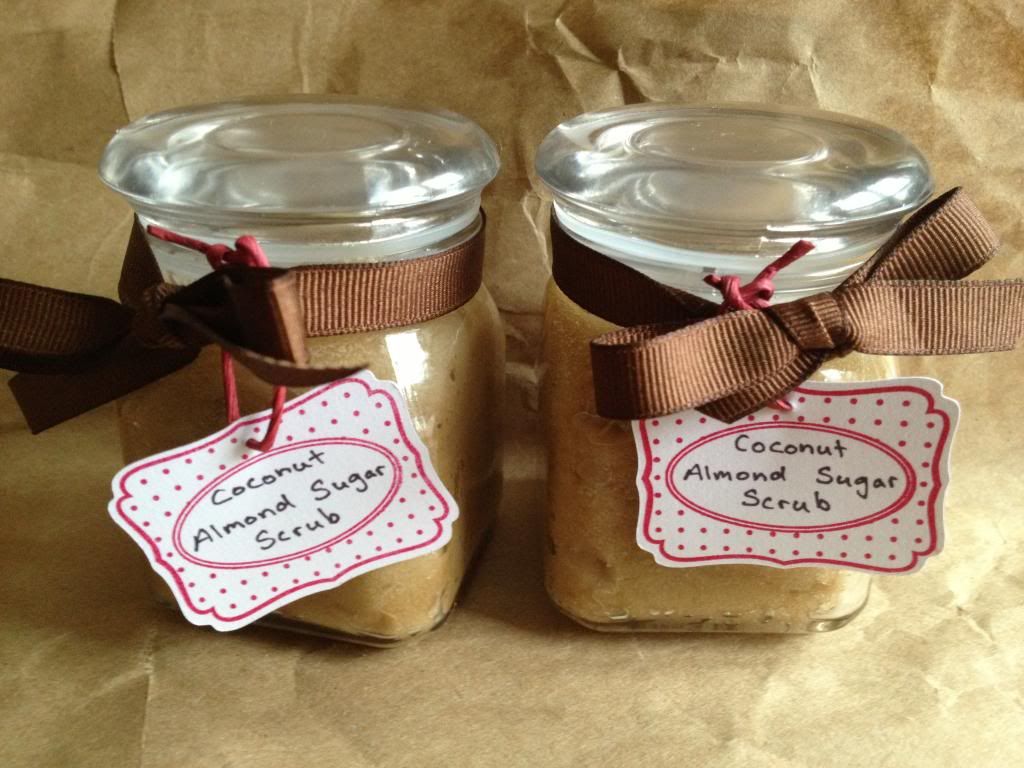
So we filled them up, cut out some tags with  the Cricut Art Philosophy cartridge and stamped them  using the (B1399) Crafed with Love Stamp Set.

This was what our final creation looked like:
It was simple and fun. We each also kept a little jar for ourselves!
 
I put a little note on the back of the tag saying this was best for hands and feet. I keep a jar in the shower and use it on my arms and legs too (it's great for winter dryness). I would avoid the face unless you've used coconut oil on your face before without any problems.
 
Wouldn't these make a great little Valentine's Day gift?
Pin It

Tuesday, January 15, 2013

A Cup of Good Cheer

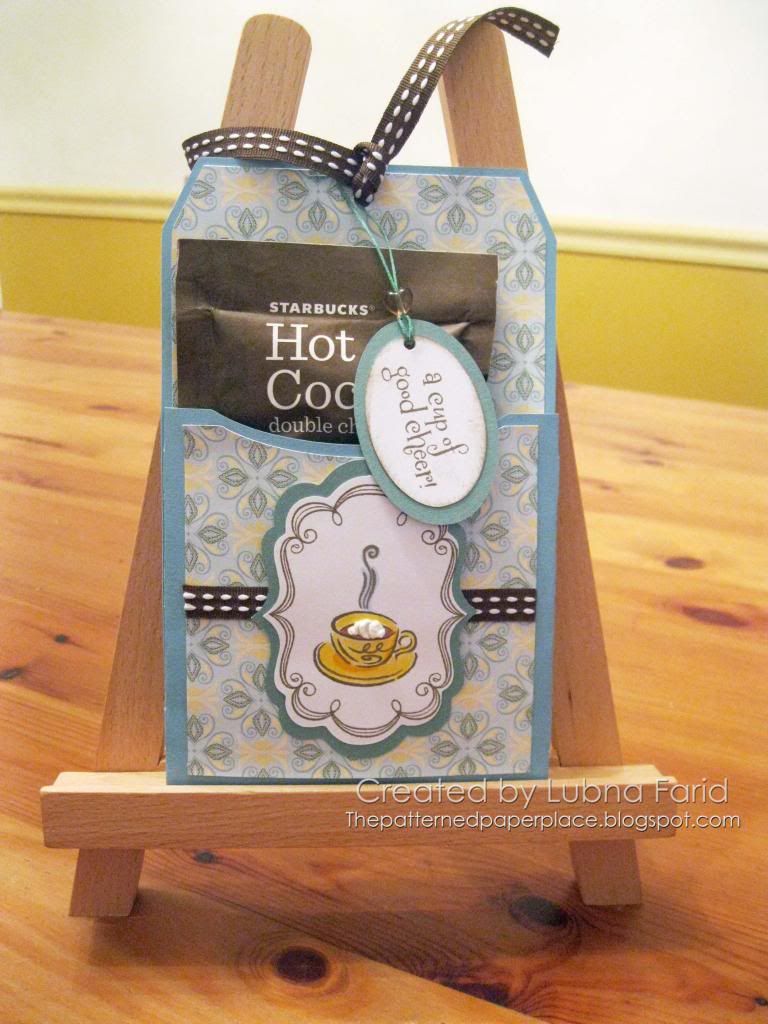
This week's Heart 2 Heart Challenge is Hot Cocoa. I took the theme literally and came up with a Hot Cocoa holder! I used my Cricut Artiste cartridge to make a library pocket (shift, card, key U). If you use "Fit To Page," the size will show up as 6" so I made a liner for it sized at 5-3/4" using the same shape. My liner sheet is another sneak peek from my favorite new paper pack, Chantilly (available on 2/1/13). The frame is a sneak peek from a new stamp set called Frame Flair.

Supplies Used (all CTMH except Copics)--
Stamp Set: (B1404) Cup of Cheer, (D1546-available 2/1/13) Frame Flair
Stamp Pad: Chocolate
Cardstock: Crystal Blue, Juniper, White Daisy
Patterned Paper: (available 2/1/13) Chantilly
 CTMH Markers (Retired): Buttercup, Sunflower
Copics: B21, E25
Embellishments: Liquid Applique, (Retired) Heart Bead, (Retired) Juniper Waxy Flax, Designer Ribbon Cocoa Collection, Cricut Artste, Cricut Art Philosophy
Pin It

Tuesday, August 7, 2012

Display Tray

One of my must haves from the new Close To My Heart catalog was the display tray. I was so excited to see it in the catalog and it was one of the first things I played with when my new items arrived. Here's what I ended up doing with it.

Believe it or not, every item I used on the tray is CTMH (except that I embossed the Sweet Leaf rectangle with a Cuttlebug folder) although some of it is very old. It's as if my hoarding had a purpose...somehow I knew I would use those little doodads on this display tray eventually!

I left my chipboard letter F unadorned but I'm still wondering if I should stamp it or cover it with paper. I do kind of like that your eye has a place to rest. What do you think?

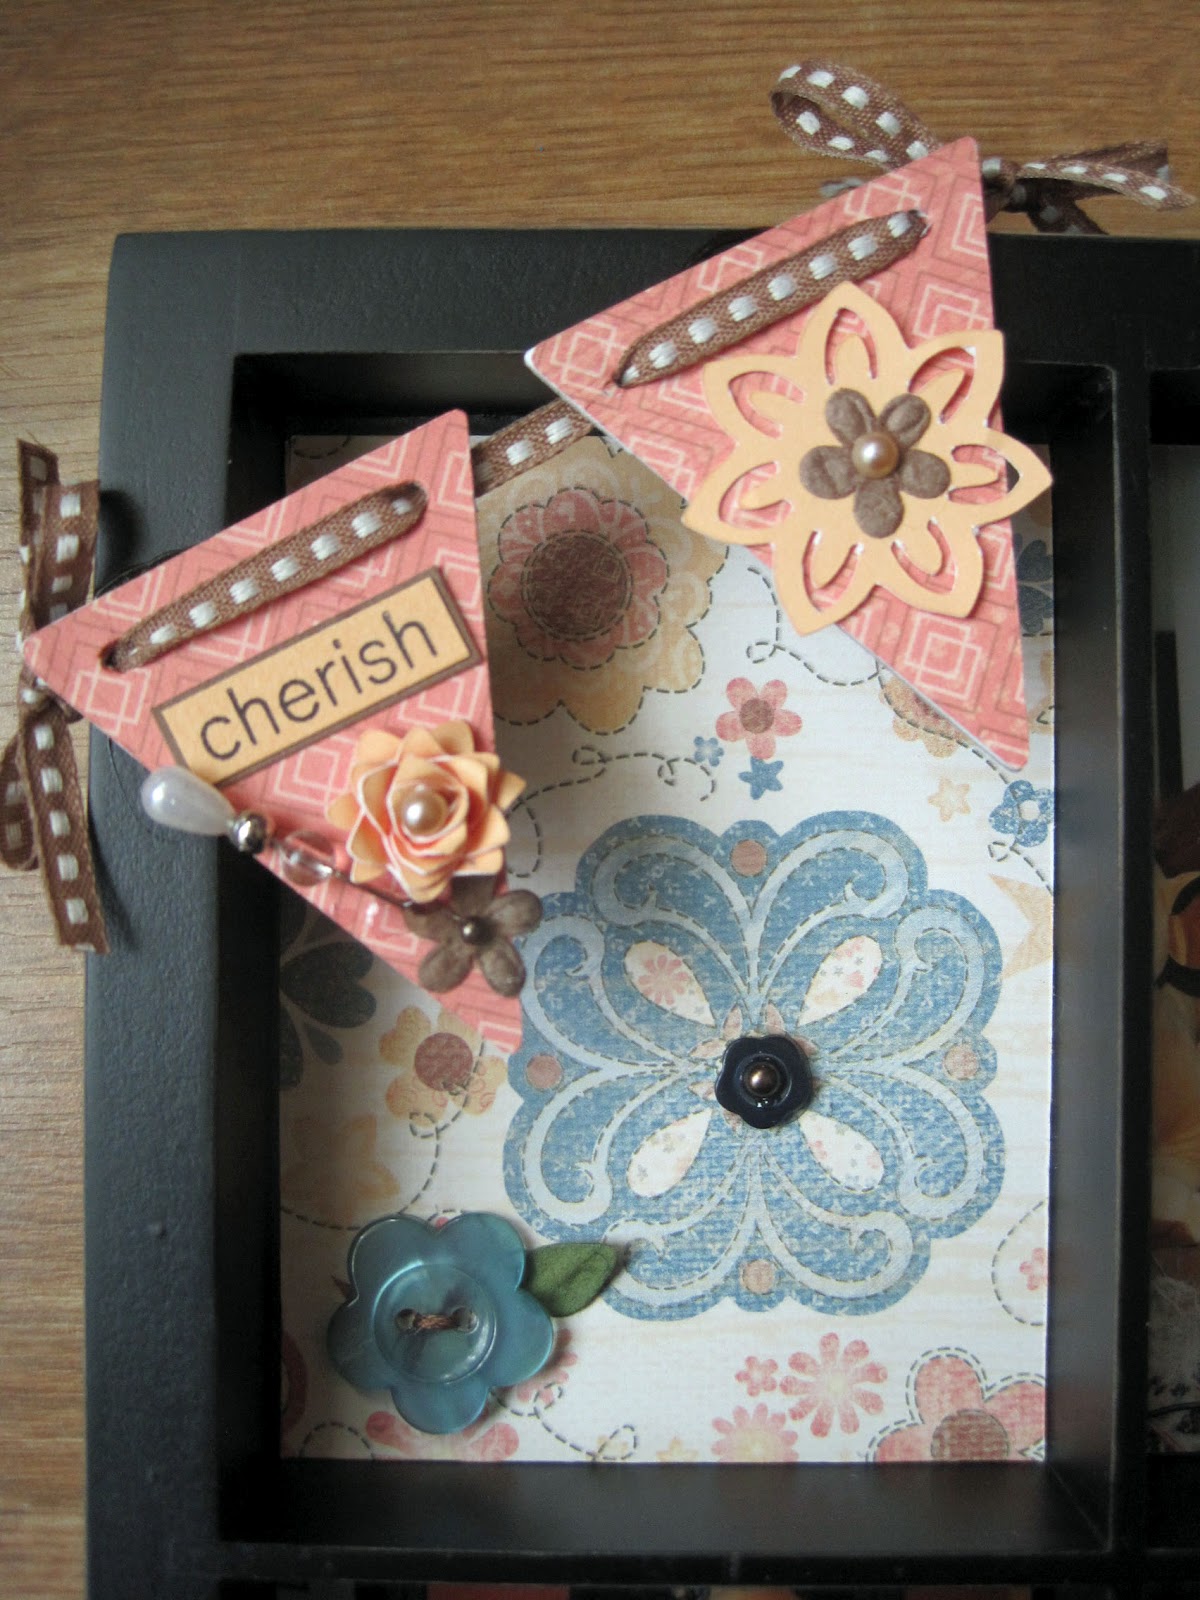
Here are some close ups of a few of the compartments. I used both the Cricut Art Philosophy cartridge and the new Cricut Artiste cartridge throughout my project. The upside down triangle banners (Art Philosophy) are on chipboard die cut shapes to make them more sturdy.

The "Family" sentiment is on some shapes cut with the Art Philosophy cart and adhered to a chipboard die cut and popped up with foam tape. Remember the Canvas Badge Buttons? I used one in the collage below to make the stamped circle "Love This" pop up a bit. I used our old peated ribbon to make a flower (just wrapped aound itself, glued it with Tacky Glue and stuck a brad through the middle). The "leaf" is one of our old Foundry embellishments (originally meant to be a photo corner, I think).

 The main banner below is another chipboard element (paper is cut out with the Artiste cartridge).

Supplies used (I'm not listing unavailable products)
(Z1750) Display Tray,
Paper: (X7156B) Clementine Paper Packet, Sweet Leaf Cardstock, Chocolate
Cricut Cartridges: (Z1790) Artiste, (Z1686) Art Philosophy
Stamp sets: (D1482) Love Life
Embellishments: (Z1127) Designer Ribbon Rounds™ Chocolate Collection, (Z1371) Buttons Blue Assortment, (Z1410) Antiqued Copper Designer Brads, (Z1333) Opaques Mocha Adhesive Gems, (Z1269) Filigree Charms, (Z1336) Opaques Pearl Adhesive Gems, (Z1466) Bling Assortment, (Z1685) Dimensional Elements Banners, (Z1683) Dimensional Elements Mixed Shapes, (Z1659) Dimensional Elements Monograms "F", (Z1276) Mini-Medley Accents Colonial White, (Z1096) Embroidery Floss Neutral Assortment
Stamp pads: (Z2114) Cocoa, (Z2167) Créme Brulee, (44751) Archival Black, (Z1296) Distressing Inks

Pin It

Thursday, July 19, 2012

Gnome Home


I love the CTMH stamp set Gnome Garden but, as so often happens with me, I set it aside after getting it and never inked it up because I was waiting for the right inspiration! Well, now it will be retiring soon so I thought it would be a shame if I didn't use it before August 1st rolls around. Heart 2 Heart's latest challenge is a wonderful sketch and helped me put my stamp to use.

Here's the sketch:

Here's my card!

Supplies used (all CTMH except where noted): Cranberry cardstock, Creme Brulee cardstock, Chocolate cardstock, White Daisy cardstock, (X7148B) Pemberley paper pack, (C1470) Gnome Garden, (44751) Archival Black stamp pad, (Z1701) Baker's Twine Neutral Assortment, Retired Cranberry buttons, (Z1686) Art Philosophy Cricut cartridge, Spellbinders nestabilities (circles large and small), Cuttlebug embossing folder (Victoria and Seeing Spots), Copic markers 

My daughter and I have a long term project (translation: we do a little and then stop, then we do a little more and stop) of making a sort of fairy garden spot in the backyard. So I'm picturing using this stamp set on a scrapbook layout for pictures of our little fairy garden if we ever finally get around to completing our project! Isn't that funny? Getting a stamp set to go with pictures you don't even have?
;-) 
Pin It

Sunday, July 15, 2012

Happy Birthday: Mojo Monday 249

I love this sketch from Mojo Monday and I wish I had looked at it earlier! Well, better late than never. :-)

The stamped bicycle image is embossed in black and I used the Cruisin' paper pack. Right now Cruisin' is only available as a Workshop on the Go and will retire on Auigust 1st when the new catalog goes live. Love this paper!
Supplies used: (X7154B) Cruisin' paper pack, (C1439) Enjoy Life stamp set, (C1494) Card Word Puzzle stamp pad, (Z2105) Black stamp pad, (Z2124) Grey Flannel stamp pad, (Z670) Black embossing powder, (Z891) Versamark stamp pad, (Z1701) Neutral Assortment Baker's Twine, (Z1686) Art Philosophy Cricut Cartridge
Pin It

Saturday, July 14, 2012

Gift Cards

It's so nice to have access to the internet again! A day after the derecho storm that hit our area, our landline and internet went down for a week. However, we were still so much luckier than so many people and never lost power and didn't have any damage to our house or neighborhood, thank God!

Even before the storm, I had been having some issues with the touchpad on my laptop freezing up and essentially making my computer unusable. I finally broke down and got myself an external mouse. That seems to have solved my computer usability issues so I thought it's high time for another post!

First off, I wanted to say thank you to the folks at the wonderful Heart 2 Heart Challenge Blog. One of my cards was picked to be in their June Top Ten! Yay! Click here to see the post with that card.

Secondly, I also wanted to say thank you to all you sweet bloggers who have been commenting on my cards/posts. I read every comment and appreciate all of them! I'm hoping I'll be able to reciprocate more, at least for the summer months when my schedule isn't as crazy as it is during the school year.

I have been spending a whole lot of time cleaning out my basement and crafting area. More needs to be done but I am actually able to find things again and have space to put things back. I intend to clean up even more and take pictures of how things are set up down there at some point but for now, I am loving having room to create.

Since I've been cleaning and going through my things, I've come across tons of retired paper, of course. You all know I'm a paper hoarder, right? Although I am going through my retired papers and using up what I can on my scrapbook pages and standard cards, I still hate to get rid of the smaller scraps so one of my projects has been to create sets of 3" x 3" gift cards.

I start off by taking a 3" x 6" neutral piece of cardstock and folding it in half (with one of my multitude of bone folders which are now neatly organized on my desk!) to form my base. You could also use your handy dandy Art Philosophy Cricut cartridge to make some card bases. Then I start to play! With some cards, I simply use a 2 3/4" x 2 3/4" square of patterned paper on top and I sometimes add a little bit of embellishment. Some of the paper is so pretty though, that there is no need. I inked up the edges of this paper for a bit of contrast. These were very quick and simple to make. Have you ever been in a rush to get out the door on your way to a birthday party when you realized you didn't have a card? Make up a bunch of these to have on hand and your problem is solved! Or how about using one of these once in awhile to drop a note in your child's lunchbox?

With some of the cards, I added a bit more stamping and patterning with the scraps of left over scrapbooking paper. I also used a decorative scissors to add a deckled edge on one of the following cards.
For my last grouping, I used my Art Philosophy Cricut cartridge to cut out a number of shapes from scraps and I added decorative borders with some Martha Stewart punches. Wouldn't a set of these in a small box be a sweet little gift?

The stamp set Enjoy! is a really great one to use for this type of project.

Pin It

Saturday, June 23, 2012

Clean and Simple Sketch #196

After the last day of Scramp Camp, I found myself looking at a ton of scraps on my dining table. It was the Clean and Simple Stamping blog to the recue! Sketch #196 is a wonderful scrap user upper. I can see my self using this sketch often.

I decided to combine squares from three different papers which each had circle patterns on them and which had similar colors. I'm really loving circle patterns lately! I cut the Colonial White banner using my CTMH Cricut Art Philosophy cartridge, inked up the edges of the banner, and then stamped a sentiment from the Card Chatter - Birthday stamp set.
The best part of this process was that I had enough time and paper to make some multiples. Maybe I'll finally have some cards on hand when I need them!
Supplies used (all CTMH except for green scraps): (D1475) Card Chatter - Birthday stamp set, (Z2114) Cocoa stamp pad, (Z1686) Cricut Art Philosophy Cartridge, Colonial White cardstock, Buttercup cardstock, (retired) Caboodle paper scraps, (retired) Good Times
Pin It

Friday, June 22, 2012

Bee Happy Thank You

This is one of those projects I started awhile ago and never got around to photographing. I used the Mojo Monday Sketch #245, but I never posted it on their challenge blog since I didn't photograph it until today!

Part of the reason that it took me some time to photograph it was that I wanted to make enough to send one to each of my preschool students as a thank you. I also was busy preparing for Art Camp which ended today. I used a bee stamp from the Bee Happy stamp set since we were the "Yellow Bumblebees," during our end of the year field day.

I played around with some of my new copic markers which I got using a gift certificate for Oozak.com (a gift from my lovely preschool class) to color in the sweet bee stamp. I'm still learning but here's a closer look at the colored image.

I didn't want to have to worry about whether or not I would need extra postage for these cards but I still wanted some dimension so I used one of my favorite techniques. After using a regular hole punch to get the red circles on the bottom left and the light yellow center for the flower, I applied some Liquid Glass.
After the Liquid Glass dried, my little punched holes somewhat resembled brads and give my cards dimension, not to mention some shine, without too much bulk.

Supplies used (all CTMH except for copics and nestabilities dies): (January special from 2009) Key to My Heart papers, (X7141B) Elemental Level 2 paper pack, (Z679) Liquid Glass, (B1374) Bee Happy stamp set, (44751) Archival black ink, (Z578) Corner Rounder, (Z1710) Just Blooms Paradise Paper Flowers, (Z1686) Cricut Art Philosophy Cartridge to cut banners, Copic markers, nestabilities 


Pin It
Related Posts Plugin for WordPress, Blogger...