Showing posts with label cards. Show all posts

Wednesday, July 26, 2017

Panda Thank you from the Bottom of My Heart

Here's another little sneak peek! I have been waiting ages for Close To My Heart to come out with a "Panda," stamp. The panda is the mascot of the school where I work so I thought it would come in very handy for cards and such. I had almost given up hope, but in this catalog there are not only one, but two stamp sets with a panda stamp. My favorite is this one below! Yes, I only got the stamp set for one image! But I do hope to use the other stamps sometime. 😉


I worked on a little card and colored the panda with my ShinHan markers. I used foam tape to pop up a little punched heart to go with my sentiment. Bonus points if you can name the retired paper I used for the background of the card!


Pin It

Monday, April 10, 2017

True Love Kids Thank You

My creative time has been fleeting lately so a few hours to create today was a treat. I decided to do some coloring with my ShinHan Touch Twin markers and used the ultra cute True Love stamp set along with the retired Dream Pop papers (you know I'm a hoarder, right?). The "Thanks," sentiments is from the retired Cricut Artiste Word Balloons stamp set. I like how it all came together!


Pin It

Tuesday, January 3, 2017

You're the Sweetest Card

Happy New Year!

Have you had a chance to see the new catalog? If not, click here to view the Seasonal Expressions fro Jan-April 2017!

There are a whole slew of beautiful new papers, coordinating embellishments, and stamp sets!

The Sugar Rush designs are among my favorites! I used the Paper Pack, the Thin Cuts Bundle, and the Sugar Rush Cardmaking stamp set for this quick card.


Pin It

Sunday, November 27, 2016

Winter Themed Cards

Here's a picture of some cards I've been working on. I'm really enjoying using the Thin Cuts. I used the Cozy Christmas Thin Cuts Bundle for the snowman card and the Snowflakes Thin Cuts for the top two cards. And, of course, I'm still playing with the CTMH Cricut Flower Market cartridge (wreath card).


Pin It

Sunday, July 3, 2016

Thank You Panda (Koala)!

I have long been waiting for Close to My Heart to come out with a panda stamp since that is the mascot of the school where I work. It would come in so handy for cards for the students and staff! 

By chance, I came across this amazing video tutorial made by Stephanie Davis. She shows you how to turn Close to My Heart's Cute Koalas stamp (D1642) into a panda! I do recommend watching the video but essentially you mask the koala's nose with a piece of tape when inking up your stamp. Before stamping, you simply remove the tape. In her video, she also masked the stomach but since I was using a different koala stamp from the same set, it ended up being too complicated for me to do that. Then you use a capital "O" and a lower case "o" to make the ring around the eyes. I was blown away! So of course, I had to try it.

Here are the ShinHan Touch Twin marker colors I used.

Here are all of the stamp sets I used.
The two from the Cricut Collection are both from the Cricut® Artfully Sent Collection
Since I would be coloring, I stamped with Memento ink to avoid smearing.

So, after taping off the nose and stamping the "O's," the koala looks a lot like a little panda (without a nose). The eucalyptus even looks like bamboo to me! 

Here's a progression of photos to show you how I colored the panda.


As Stephanie explains in her video, start with your lighter gray and then add shadows with the darker. Then go back in with the lighter to blend.


 Since pandas have a band of black across their chests where their arms are, I just colored in where I thought it would go.

Then I darkened it in!

I colored in the bottom and feet using the same concepts. Since I couldn't mask that "tummy" line very well, I just kept it in and used it!

Next, I colored in around the eyes and added a nose.

I used the Light Orange, just like Stephanie, for the ears and to add color to the cheeks.


After using the Colorless Blender, the ears and cheeks look more subtle and then I added Pastel Green to the bamboo.

I stamped, colored and cut out a bunch of pandas to begin with.
Don't they look cute!

Then I worked on the card base. I used papers from Zoe, Florence, and Magical. I also embossed strips of Pear.


I based my card design on a sketch from the April 2016 Cardmaps designs (the second one displayed on their page). I used the Cricut® Artiste Cartridge to get the notebook style cut in the upper left and CTMH's Scallop Border Punch on the red paper. 

I did use one retired product, which I miss a lot! Loved these borders but I did hoard them so I'm still able to use them.

 My final result was this card.

Since I had to make a lot of thank you cards, I ran out of my background paper so I subbed another similar one from a retired paper pack. Bonus points if you know the name of that paper pack!


Pin It

Friday, May 20, 2016

Celebrate with Cake!

The 2016 May stamp of the month, Celebrate with Cake, is the ideal stamp for birthday cards! It's also a fun one for coloring. This was a relatively quick card I made with my brother's birthday in mind. I used the ShinHan markers and my old standby, foam tape, to make the card pop a little. The blue patterned paper is from the Magical paper pack.


Pin It

Monday, May 9, 2016

Tickled Pink Flamingos

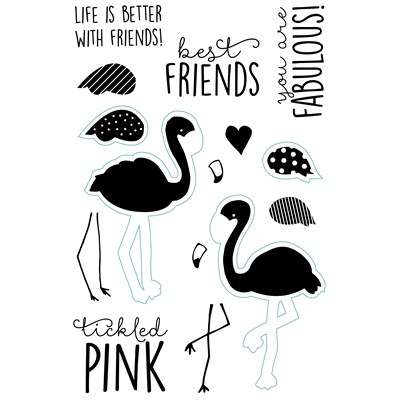
I tried to restrain myself when I looked through CTMH's Seasonal Expressions 2 . But when I looked at page 32 and saw the C1651 Tickled Pink stamp set with those cute flamingos AND that they also had coordinating thin cuts (Z3228), I just couldn't resist! Look at it!

So much fun! I started off by just die cutting a bunch of flamingos and wings with the Thin Cuts. Then I stamped!
It's a flamingo party!!!
I decided to make a simple card and here's what I came up with.
The polka dotted paper right behind the flamingos is from this month's gorgeous special Happy Times Paper Pack. The green polka dotted paper behind that is from the Zoe paper pack. I used Pixie and Smoothie stamp pads to stamp the flamingo bodies and wings. I used Memento Black for the beaks and legs. I usually don't hand draw but I saw a beautiful flamingo card online made by fellow consultant Susan Williams where she had outlined her text boxes so I decided to challenge myself and try it out. Let me know what you think!
Pin It

Friday, January 1, 2016

You Warm My Heart Card with Georgie

Happy New Year! I'm spending part of today doing something I love, creating! 

I'm combining old and new. For the new, I'm using some of the gorgeous Georgie paper and the Teal Shimmer Trim. For the old, I'm using the Wonderland stamp set from an old Workshop on the Go (G1031). You can see how I used it here and here and here in the past. The "smoke" rising from the cup is actually a plant tendril from a different stamp set, also retired, called So Grateful (B1395). Also for the old is a bit of retired Frosted paper used as the beige background for the sentiment.

I need to make a bunch of these and will be using them as thank you cards so I tried to keep my design on the simpler side for mass production!

When you first look at the papers in Georgie baby themed projects certainly come to mind, but I was actually attracted to the circles and chevron patterns in the pack. I thought the circles with their soft yellows and blues would go well here. Let me know what you think!


Pin It

Thursday, July 2, 2015

Wavy Blooms Notecards

Over the past few weeks, I made a bunch of card sets to give out to various teachers at my daughter's school as well as to some colleagues and friends for the end of the school year. Wavy Blooms is such a great set to color with the Shin Han Touch Twin markers and the images look so striking! Although it took me quite a while to color in all the flowers for all of the various sets of cards I made, it was a no-brainer for me to use this wonderful stamp set to make my cards! Here's just a sample of some of the cards I made.

Since I had so many to make, you can see that even though I changed up the colors, I kept my design fairly simple. I made approximately 30 cards with some sort of variation of this design. Phew! I'm hoping to make some more so I can have some cards on hand if I need them!
Pin It

Saturday, May 23, 2015

Wavy Blooms Birthday Card

I totally understand the current popularity of adult coloring books. It's a great way to de-stress! Wavy Blooms is a wonderful stamp set for coloring. I used our ShinHan  markers and the Taste of Summer paper pack to make this card. I also added some Pear cardstock, Gold Sequins, 3-D Foam Tape, and used one of the stamp sets from the Artfully Sent Cricut Collection for the Happy Birthday sentiment.


Pin It

Wednesday, February 4, 2015

Floral Condolence Card

Here's a condolence card I made with my latest favorite go to overlay card design from the Artfully Sent Cricut cartridge (shift, sleeve, key e) cut in Colonial White. The flowers are different sizes of one design from the Art Philosophy Cricrut cartridge. I wanted the flowers to be relatively flat so I could mail the card but I still wanted them to have a bit of dimension, so I just adhered them in the middles and bent up the petals a bit. The Background and Texture paper is from the Seaside paper pack. The inside sentiment is also from the Artfully Sent Cricut cartridge (same key as the overlay card).  


Pin It

Saturday, January 10, 2015

Tardis Card made with Artfully Sent

So I don't know how successful I was but I tried to make a "Tardis" card for a friend who is a Dr. Who fan. It doesn't say Police Public Call Box and it doesn't have a litle light on top but I think it gives the impression of a Tardis...maybe? I love the detailed cuts on this made with the handy dandy Artfully Sent Cricut cartridge.


Pin It

Tuesday, January 6, 2015

Artiste Valentine

Here's what I thought would be a simple card since the Cricut and the Artistes cartridge do most of the work. But I don't have the newest version of the Cricut. I have a Cricut Expression and haven't really tried connecting to Craft Room or Design Space or whatever and I just take guesses at sizes sometime! So it took me a few tries to get a reasonable sized card. 

This is the card when it's all opened up. The hearts have slits which fit together. I also put my paper the "wrong" way on my Cricut sheet because I wanted the pattern to show differently. I ended up using the red pattern which I originally wanted on the outside to be on the inside! Then I added scraps to the outside to make the red pattern go the way I wanted. I'll probably spruce up the inside too!
 Here's the card folded up.
 And a side view...
 ...and all of my tries from Lilliputian to somewhat normal sized. The little ones are cute though. I'll probably use them for something!

Pin It

Saturday, January 3, 2015

3-D Flower All Occasion Card

Here's an all-occasion card I made using the Art Philosophy Cricut cartridge, the Artiste Cricut cartridge and a variety of papers including our new Heartstrings, Brushed, and the retired Babycakes, as well as a journaling card (the yellow diagonal striped part) from the My Crush™ Besties Assortment. I'm learning to mix and match!


Pin It

Monday, October 27, 2014

Hats Off To You Birthday Card

I felt inspired after the Card Buffet on Saturday and got right to work on some more designs for my November Card Buffet. I'm trying to use up some older paper so I designed something using the argyle pattern from the old Cruisin' paper. For some reason, I have a ton of this paper! I used the Hats Off (C1593) stamp set which is only available as a hostess reward. You can purchase it for $8 with any order -- combined or just your own -- of $150 or more. I always have a difficult time coming up with masculine themed cards so I was very happy to see this stamp set in the catalog (page 8).

 I used my Art Philosophy cartridge to cut out the tags and some hemp to tie the tags together. I also used my new Arrows Embossing Folder.

 Since the front of the card had a few layers with the tags and all, it got a little "top heavy," so I added paper to the inside of the card as well. It's difficult to tell from the picture above but there is a gray sheet of cardstock under the argyle and brown.

This is just another view of the card.

This will be one of the many cards you can choose to make at my Card Buffet on November 15th!
Pin It

Monday, April 28, 2014

Thank You Dreamer Card

I made a bunch of these cards for my daughter to use as thank yous for her friends. The Dreamer stamp set is one of my favorites! I love the collage look of the images and the image of the girl reminds me of my daughter. I also used Card Chatter -Thank You (retired). For paper, I used the Lollydoodle Paper Pack and I added some Juniper cardstock with a touch of Smokey Plum cardstock. I stamped the butterfly in Juniper ink and then popped it up with foam tape.  The Thank You is stamped in Pear ink. I used color pencils for parts of the image of the girl.


Pin It

Sunday, September 1, 2013

Card Workshop: September 14th

Do you need to restock your supply of greeting cards? Join me on September 14th from 2-4pm and we will make a set of eight cards, two each of the above designs, using the gorgeous stamps and papers from the new Idea Book. Email me at lubfarid@gmail.com to reserve a spot.

The workshop fee is $10 or for $3.50 more, you can order a monogram stamp, as shown in the second card. If you'd like to order a monogram stamp, just let me know by September 5th so it gets here in time. Bring your own adhesive and I will have some on hand for purchase in case yours runs out. If you'd like to reserve your spot at the workshop, let me know by September 10th (or by Sept. 5th if you are ordering a monogram). The first three people to reserve a spot will get a free stamp set from me!
Pin It

Friday, August 23, 2013

Tommy Thank Yous and Journaling Cards

Today is the final day of my, "Use up all of my Tommy Paper Pack," challenge! So, by now, I was down to smaller scraps. I decided to add a piece of retired gray cardstock, which I should use up anyway, right? I made two standard card bases from it and cut out some shapes with my Cricut Art Philosophy cartridge to match a stamp I wanted to use from the D1542, For a Friend, stamp set. Using my leftover scraps, here's what I came up with. Since the fronts of these cards are relatively light, I kept the insides blank.
 
Well, then I still had some scraps so I made some journaling cards which I could possibly add to
 my Project Life Style Album or to one of the layouts I made with Tommy.

So I got quite a few projects done with one paper pack! I only added two full 12" x 12" sheets of cardstock (Grey Flannel and Slate) and one White Daisy card base plus White Daisy scraps and Colonial White craps. After making all of the projects I shared with you this week, I am left with just the few scraps pictured here. For reference, that striped square piece measures 1.5" x 1.5."
 
Not bad, don't you think? Of course, when I finished, my daughter asked, "Do you have any more of that red anchor paper?" Sigh!
 
I imagine I could probably get another card or journaling spot out of these scraps but I'm content with filing away the larger pieces in my scrap drawers and recycling the smaller pieces for now.
I hope you enjoyed my challenge and seeing what I could come up with.
Pin It
Related Posts Plugin for WordPress, Blogger...