Showing posts with label Twine. Show all posts

Wednesday, August 21, 2013

Tommy Birthday Card #3

Here's the third birthday card I made with Tommy. I decided that since I was trying to use up my whole paper pack, I should try to finish the Tommy Assortments also, and I only had two pieces left from my Assortments pack. I really like the little canvas flags and cork pieces that come in the Tommy Assortments pack. I almost thought I should hold on to them...but I was good and did not hoard them! I added a little bit of the yellow and white Baker's Twine and again, as with my first Tommy layout, I may add some Outdoor Denim or Cranberry once I get the Harvest Baker's Twine set. The sentiments are from the Card Chatter - Birthday stamp set, a set I go back to again and again.
 
Front of card
 Inside of card (the inside really needed some heft since I had added the Tommy Assortment embellishments to the outside -- it helped the card even out a bit in weight)
 
Tomorrow, as I continue my, "Use up all of my Tommy Paper Pack," project, I will show you another double layout I made.
Pin It

Sunday, August 18, 2013

Tommy Pattern Nine Scrapbook Layout

Believe it or not, I hadn't touched the Tommy papers even though I had bought them with the release of the Spring/Summer 2013 Idea Book all the way back in January. I love them. The colors are vivid and the designs are crisp and bold. Sometimes when I really like a paper pack, I'm afraid of cutting into it. My hoarding tendencies come out and I don't want to ruin the paper. Crazy, no? So, I thought I needed to challenge myself. I decided to try to use my whole pack of Tommy...all at once!
 
For the next several days, I will feature the different items I made using the Tommy Paper Pack. Here's what it looks like and what comes in a pack.

I used Make It From Your Heart, Volume 1, pattern 9 on page 22 for the following scrapbook layout.
I also used the Tommy Assortment pictured below to add some pizazz to my layout.
Pin It

Monday, February 25, 2013

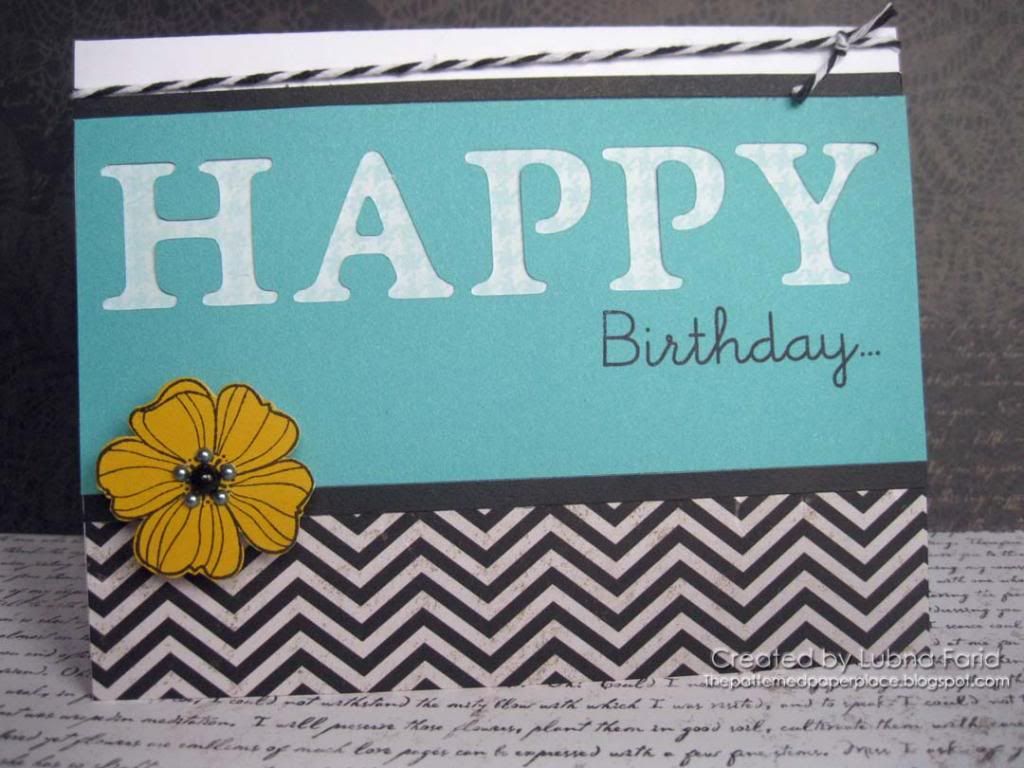
Chevron Happy Birthday

Every year, a few of my college friends and I get together and we celebrate our birthdays. We have one December birthday, two January birthdays, and one September birthday but we usually aim to meet sometime between January-March. We all have work, school, extra-curricular, and/or family obligations plus one of us drives from out of town, so you can just imagine how difficult it is to find a Saturday that accomodates all of our schedules. Well, this past Saturday was our day. We went to see a play, had dinner at a nice restaurant, and then came back here to exchange presents, have cake and do a little beading!  
 
I opted to make the same style birthday card for each of them. I was really intrigued with this sketch from the Clean and Simple Stamping Blog.
I really love the example which uses the negative space for the word and wanted to try that out. The sketch was from the 15th but I hadn't had a chance to play with it because I've had tennis elbow (from stirring sand, alum, and cornstarch together in a pot on the stove to make treasure rocks for my preschoolers -- how do I explain that to people?!) and I have had to rest my arm. But there's nothing that motivates me like a deadline so I worked on Saturday morning...yes the morning before we were to meet! I used my Cricut Art Philosophy cartridge to make quick work of cutting the letters out of my Lagoon (teal) cardstock and got three panels with the word, "HAPPY," cut out of them, lickedy-split! It's difficult to see but the paper backing the, "HAPPY," panel is a lighter blue houndstooth pattern from a long retired CTMH paper called Splendor. I added the little flower from the Card word Puzzle set stamped on honey for a little pop (and I popped it up with foam tape)!
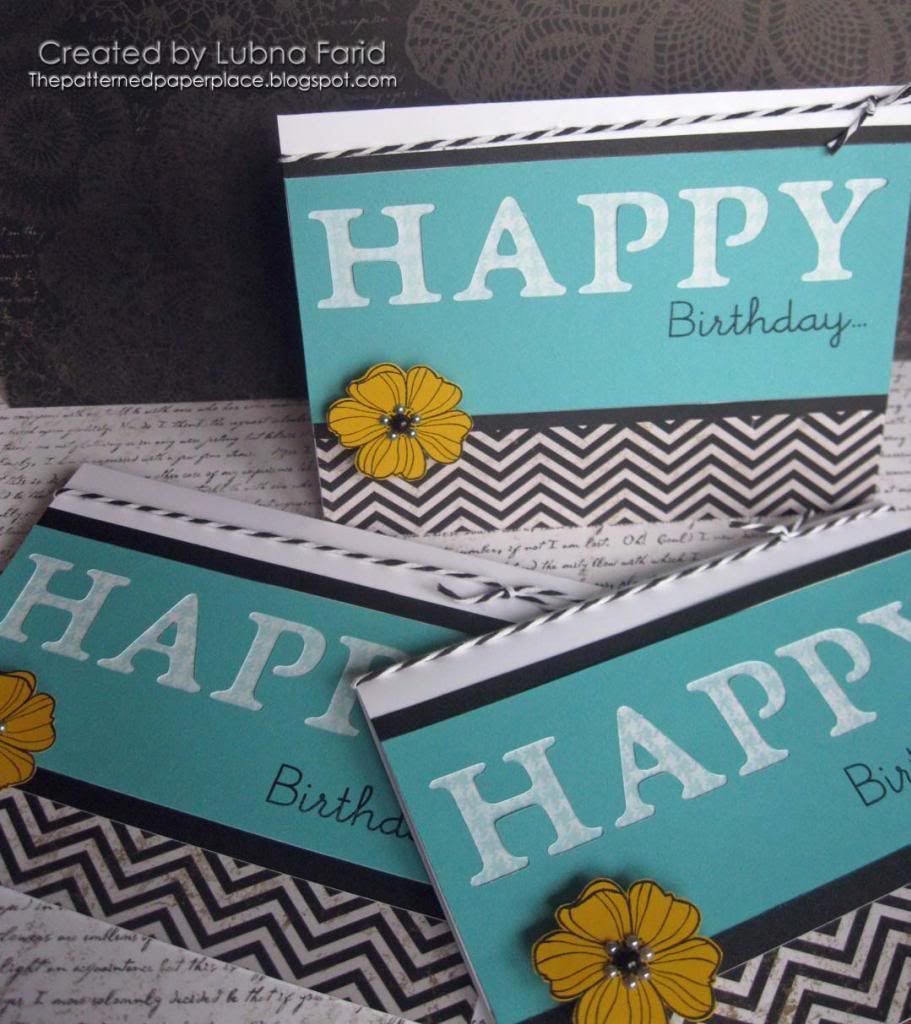
 
 
Supplies Used (All CTMH)--
Patterned Paper: For Always (love that chevron pattern) and a scrap of blue houndstooth from the retired set called Splendor (used behind the HAPPY)
Cardstock: Lagoon, Honey, White Daisy, Black
Stamp pad: Archival Black
Stamp sets: Card Word Puzzle and Card Chatter-Birthday (I cut Birthday... off of the rest of it's sentiment-you could just mask it too)
Embellishments: Baker's Twine Neutral Assortment, Opaques Licorice Adhesive Gems, foam tape
 
I have also been wanting to play along with the Heart2Heart challenges but my arm has been bugging me too much. I was so happy to see that this week's chalenge is for  CAS-Clean and Simple. Yay! So I'm linking this post up to this week's challenge at H2H.
 
Pin It

Saturday, February 9, 2013

Project Inspirations: Mini Album

I love this project which uses cuts from the Cricut Artiste! It's a great way to use up some extra scraps you might have laying around and I think it would make a cool gift, especially if you have any preteen or teen girls in your life. The ones I know seem to love journals! Of course you can always make a masculine version too!


Pin It

Tuesday, June 26, 2012

A Little Birdie - Retro Sketches #17

It seems that I am gravitating to sketch challenges lately! I made some more time for creating (don't worry, I did do some laundry too finally!) and based my card on Retro Sketch #17.
I pulled out my CTMH June Stamp of the Month, which I love but hadn't used yet! This is what I came up with.
The outside doesn't really make sense by itself  so here's a pic of the inside.

Supplies used (All CTMH except where noted): (S1206) A Little Birdies stamp set, (Z2105) Black stamp pad, (X7154B) Cruisin' Level 2 paper pack, (Z1701) Baker's Twine Neutral Assortment, (Z578) Corner Rounder, Spellbinders Lattice Rectangles Nestabilities, Crayola and Loew-Cornell Colored Pencils
Pin It

Sunday, June 24, 2012

Best Fishes - Freshly Made Sketches #40

I used the following sketch from Freshly Made Sketches to make my card.

I changed my card a little bit and since my main image already had a sentiment, I used a wooden shell embellishment instead of the banner on the bottom left.
Supplies used (all CTMH except where noted): (X7151B) Footloose Level 2 paper pack, Cocoa cardstock, Pear Cardstock, (C1500) Under the Sea stamp set, (44571) Archival Black stamp pad, (Z2194) Sky stamp pad, (Z2195) Lagoon stamp pad, (Z2197) Pear stamp pad, (Z2167) Creme Brulee stamp pad, (Z2114) Cocoa stamp pad, (Z1693) Seaside Wooden Shapes, (1771) Waterbrush, (Z1702) Baker's Twine Paradise Assortment, (Z1336) Opaques Pearl Adhesive Gems, (Z679) Liquid Glass, (Z697) Round Sponge, Cuttlebug Tiny Bubbles Embossing Folder, Spellbinders Nestabilities, Fiskars Paper Crimper, Crayola green colored pencil

I used some techniques and supplies that I taught in my recent Kids' Scramp Camp. Every participant received the Under the Sea stamp set and that's what I used here (since that's what I had out!). I combined two of the stamps from that set onto one acrylic block and then left the little tiny fish on its own block to stamp into my main image.
I used the Archival Black stamp pad to stamp my fishes and let them dry a bit before going in and using my waterbrush with ink from my stamp pads to paint. I used the Archival Black instead of the regular black just so the images wouldn't bleed while I was painting them.

Since I didn't want to use brads on my cards, I used Liquid Glass on some punched cardstock circles again (upper right corner). See my post from 6/22/12 to see details on how I do this. Although I wanted this card to be appropriate for giving to either a male or a female, I couldn't resist adding a little pearl to the shell. My son assured me that he wouldn't mind getting a card with a pearl on it. I had another small wooden shell shape which looked more like what a pearl would come in...a clam shell, so I decided to make another card with the same design. I used Pacifica ink instead of Lagoon for the "sea" and I used Cocoa cardstock circles instead of the Bamboo circles that I used in the first card on the upper right.

Pin It
Related Posts Plugin for WordPress, Blogger...