Sunday, December 29, 2013
Photos to Take Month by Month
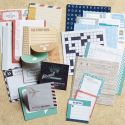
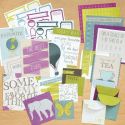
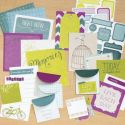
Are you thinking about scrapbooking plans for the new year? I love this little month by month photo guide from Creating Keepsakes: http://www.creatingkeepsakes.com/content_downloads/PHO-LIST-A.pdf
Pin It
Saturday, December 28, 2013
Friday, December 27, 2013
Polar Bear Fun!
I love having some time off! It's been very difficult for me to get time to create with my new work schedule. I know, I should make the time, but when I see the dishes and laundry piling up, I figure I should make time for that first!!! I even had time to go and get a bunch of new trimmer blades...I had been cutting with a dull blade for months now! It used to be that I could just pick up a Fiskars blade from Walmart or Target but my local stores don't carry them anymore. The nearest craft store is somewhat of a trek and it's a trek that's better done on a day off! Anyway, like I said, I love having time off!
I decided to do a bunch of cards which I could use as holiday, New Year's, winter birthdays, and thank you's. I picked the cute Polar Bear Holiday stamp set and the lovely To You and Yours set for the sentiment which I put on the inside using Outdoor Denim ink (some I'm leaving blank on the inside, like for the ones I'm saving for birthdays). The Polar Bear Holiday set has some great sentiments on it already but I really love the font on To You and Yours. The nice thing about the polar bear stamps is that I just needed to add a tiny bit of color with my Sky and Whisper CTMH alcohol markers and some colored pencils since they are white!
I also used the Frosted and Sparkle and Shine paper packs and Crystal Blue cardstock for my card bases because I had a lot of it! I don't know if you can tell from my pictures, but the front of my card is cut a little shorter so you can see the gray houndstooth pattern even while the card is closed and my card is slightly smaller than a standard size. It's about a 4" x 5.5" card with the front flap being 4.25" long. The Bronze Shimmer Trim and the Lagoon Houndstooth Washi Tape made for easy embellishments! I also used 3-D Foam Tape to pop up my sledding bears.
Here's a shot of my supplies. I cut out my circles using my Cuttlebug with Spellbinder dies (both regular and scalloped). I used an embossing plate to give some texture to the blue circles and inked them a little with Heavenly Blue ink (retired). In case you haven't heard, we will have embossing plates in the Spring/Summer 2014 CTMH Idea Book! Yay! We'll also have a bulk pack of sponge daubers!
Just for fun, here are my polar bears, cut out. Wheeeee! They look so happy! It really helps to have a good scissors like your handy dandy CTMH Micro Tip scissors.
Here's the outside of my final card...
...and a view of the inside!
I'm linking up with 365 Cards for their Anything Goes Challenge. Seeing as how I always seem to be in need of cards, I think I should visit this challenge blog more often and get inspired!
Pin It
Tuesday, December 24, 2013
Monday, December 23, 2013
CTMH Gift Tags
Are you in need of some last minute tags? In case you've missed it, the free printables from Close To My Heart for this month are gift tags! Go here to download them. They are only available until December 31st.
Sunday, December 22, 2013
Summer Camp Layout with Sparkle and Shine
I had a bit of scrapbooking time today, believe it or not. It's been forever since I've pulled my supplies out! The layout I'm posting is a very simple one but I wanted to show you how I used the Juniper papers from the Sparkle and Shine papers to make a layout that was completely unrelated to a Christmas theme. I love the versatility of these papers!
Pin It
Thursday, December 19, 2013
Wednesday, December 18, 2013
Tuesday, December 17, 2013
Artbooking Made Easy: Wintertime Layouts (S01E14)
Are you working on any winter layouts? Here are some ideas for you using the Cricut Artbooking cartridge.
Pin It
Tuesday, December 10, 2013
Monday, December 9, 2013
Artbooking Made Easy: Friendship Layouts (S01E13)
Here's a friendly tip: try the friendship-themed keys of the Cricut® Artbooking cartridge from Close To My Heart for layouts that shout in celebration of your cherished relationships!
Sunday, December 8, 2013
All Play and No Work! Contest: December 2013
It's going to be a snow or rather, an ice day, here tomorrow! No school! I still will probably have to do some work for one of my jobs but since I don't have to get the kids ready and out in the morning, I'm hoping to get some scrapbooking in. Maybe it can be my day of play! What would be your ideal day of play? Watch the video and make a comment on Jeanette Lynton's blog for a chance to win a Workshop on the Go Kit!
Labels:
Video
Monday, November 25, 2013
Artbooking Made Easy: Christmas Layouts (S01E12)
Try out Close To My Heart's Cricut® Artbooking cartridge for some holiday hullabaloo on your Christmas layouts! Its themed borders, overlays, photo mats, and more hold plenty of cheery possibilities to brighten your albums. Trim your trims, ornament your ornaments, and have a holly jolly time making Christmas layouts that last—all with just two keys!
Sunday, November 24, 2013
Clearly The Best: A Countdown to Love (S02E07)
Labels:
Video
Saturday, November 16, 2013
Clearly The Best: Crafts for Your Curls (S02E06)
Here are some ideas on making fabric flowers to use on CTMH's Base and Bling or any craft project
you are working on.
Labels:
Fabric Flowers,
Video
Friday, November 15, 2013
Artbooking Made Easy: Cross-Cartridge Collaboration (S01E11)
Here are some more great ideas for using the Cricut Artbooking cartridge and on combining cuts from Art Philosophy, Artiste, and Artbooking.
Pin It
Thursday, November 14, 2013
Wednesday, November 13, 2013
Tuesday, November 12, 2013
Artbooking Made Easy: Everyday Layouts (S01E08)
Here are some examples of how to use Artbooking Layouts outside of the theme for which they were intended.
Pin It
Monday, November 11, 2013
Clearly The Best: Do the Twist (S02E05)
Here are some great ways to use the Slate Striped Twist Ties. You can even make wired ribbon and Washi tape!
Pin It
Labels:
Video
Sunday, November 10, 2013
Clearly the Best: Wacky Washi (S02E04)
This is a fun technique using Washi tape in the negative space of a cut out design. What a quick and pretty card!
Pin It
Saturday, November 9, 2013
Clearly the Best: Connect the Dots (S02E03)
Do you have a lot of leftover embellishments? Here's a great demonstration on how to use them up in a cohesive way which also gives a nice focal point to a layout.
Pin It
Labels:
Video
Monday, October 21, 2013
Sunday, October 20, 2013
Monday, October 14, 2013
Saturday, October 12, 2013
Artbooking Made Easy (S01E06): Designed Décor Flip Stand Album
Here's the latest video on some ideas for using the Artbooking cartridge.
Pin It
Saturday, October 5, 2013
Saturday, September 28, 2013
Artbooking Made Easy (S01E04): Spooky Halloween Layouts
This video highlights some of the great overlays available in the Cricut Artbooking cartridge. There are some great techniques demonstrated and I love how they show a page from the Sarita paper pack in a Halloween layout in this video. It's a great example of how even though the papers in one pack are all coordinated with each other, they are also versatile and can be used in a variety of different types of layouts. I also like some of their examples of how to use the glitter paper.
Saturday, September 21, 2013
Artbooking Made Easy (S01E03): Summer Mini-Albums
It's mini album time! This video will give you some tips on how to use the CTMH Artbooking Cricut cartridge to create some mini albums.
Monday, September 16, 2013
Hedgehog Birthday - Paper Players Challenge #163
I received my new "You Are My Happy," stamp set in the mail on Saturday (the special for this month) and I couldn't wait to play with my favorite image from the set, that cute little hedgehog! Here's an image of the sheet (1 of 3) with the hedgehog on it and the birthday cake too which I also used.
Every year, at the beginning of the school year, I think that it would be a good idea to make up a bunch of birthday cards to send out to my preschool students when their birthday rolls around. I often get started with two or three but never make enough of them for the whole class and then am left scrambling to make something at the last minute. Last school year, I did not even get to making a single one. This year, I've been motivated by that sweet hedgehog! Well, I'm not completely done...because this year I have two classes! But I do have a good head start! And before you think that I'm crazy to try this, you should know that our class sizes are small. I have eight in each class. That's manageable, right?
I'm entering my card in the Paper Players Challenge #163 (create a CAS project, "For the Kids").
I decided to do some paper piecing on the hedgehog and the cake images.
So this...
...became this!
And this...
...became this!
I also used the Surf's Up paper pack, Aqua Dots, my Nestabilities circle dies, and the Holiday Tags stamp set (I cut the tags out with the Cricut Artiste cartridge) and came up with this card design.
So do you think I can make ten (and a half!) more? Wish me luck!
Thursday, September 12, 2013
Wednesday, September 11, 2013
Sunday, September 8, 2013
Friday, September 6, 2013
Find It. Crush It. Love It.
I love the My Crush books! You can get a look at some of the pages in this video. Also, look at my post from August 24, 2013 on gift ideas using the My Crush collections.
Pin It
Monday, September 2, 2013
You're the Cat's Meow!
It's been forever since I participated in a challenge and I happened to be inspired by two last night! The Papercraft Star Challenge #159 made me think of this cute kitty cat stamp from the Cozy Cat set because of the luxurious pillow. I did some paper piecing on the kitty and pillow with the Laughing Lola and the Surf's Up paper pack. You can't see it too well in the picture but I used a bit of Silver Shimmer Trim in the collar. Sometimes fussy cutting for paper piecing is therapeutic for me! Then I used Retrosketches #79 for my layout design and made my card.
My daughter is so excited to go back to school tomorrow. This might be a nice little, "Good Luck in School," card for her to start the year off. My son is not as thrilled, but of course, he knows he will have a bigger workload being a sophomore in high school. A card might not be enough for him! Maybe a donut? ;-)Pin It
My daughter is so excited to go back to school tomorrow. This might be a nice little, "Good Luck in School," card for her to start the year off. My son is not as thrilled, but of course, he knows he will have a bigger workload being a sophomore in high school. A card might not be enough for him! Maybe a donut? ;-)Pin It
Sunday, September 1, 2013
Card Workshop: September 14th
Do you need to restock your supply of greeting cards? Join me on September 14th from 2-4pm and we will make a set of eight cards, two each of the above designs, using the gorgeous stamps and papers from the new Idea Book. Email me at lubfarid@gmail.com to reserve a spot.
The workshop fee is $10 or for $3.50 more, you can order a monogram stamp, as shown in the second card. If you'd like to order a monogram stamp, just let me know by September 5th so it gets here in time. Bring your own adhesive and I will have some on hand for purchase in case yours runs out. If you'd like to reserve your spot at the workshop, let me know by September 10th (or by Sept. 5th if you are ordering a monogram). The first three people to reserve a spot will get a free stamp set from me!
Pin It
Saturday, August 31, 2013
September Stamp of the Month: Poster Tidings
In this video, Carlie shows some great techniques to use with the upcoming September Stamp of the Month.
Labels:
Video
Tuesday, August 27, 2013
Baby Carriage Spin Card
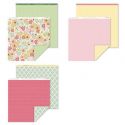
I was so excited to see Circle Spin Cards in CTMH's 2013 Autumn Winter catalog! They were one of my first purchases from the new catalog. (My daughter just said, "Your first purchase was everything!" Ok, that's somewhat true). I'm glad these are 7" x 5" because I've made standard size spin cards before and it just doesn't give you a whole lot of room to decorate your card.
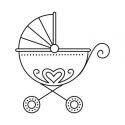
I was also drawn to the adorable "M" sized stamps. They fit perfectly onto the circle portion of the spinner card. Here I used Chantilly paper with the Baby Carriage "M" sized stamp for a baby card. I never need baby cards and now all of a sudden I need three!
I was also drawn to the adorable "M" sized stamps. They fit perfectly onto the circle portion of the spinner card. Here I used Chantilly paper with the Baby Carriage "M" sized stamp for a baby card. I never need baby cards and now all of a sudden I need three!
I also used the Congratulations stamp which comes with the Cricut Art Philosophy bundle on the other side of the spinning circle part of the card.
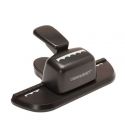
I made all of my scalloped borders lickety-split with CTMH's new Scallop Border Punch.
Here's a view of the card opened. I put a piece of the Chantilly paper right behind the opening for the spin part of the card so I would know where not to write and so it would look nice when the card was closed.
I used my Ruby pigment ink to stamp the baby carriage. I learned my lesson after trying to color after stamping with my Ruby Dye ink -- I got too much smearing. The pigment ink did the trick!I also used my Ruby, Cotton Candy, and Pear CTMH alcohol markers to color.

Saturday, August 24, 2013
Product Spotlight: My Crush Books
Look what came in the mail yesterday! My order of My Crush books!
I have been anxiously awaiting these gorgeous books! They can be used as photo albums, memorabilia keepers, journals, or some sort of combination of all of these.
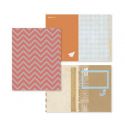
Here are a couple of pages from Modville (the one with the orange chevron cover)...
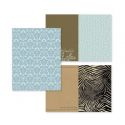
...and some pages from Bluebird (blue brocade cover).
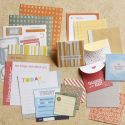
My daughter claimed Bluebird for herself and I chose Modville. As we were looking through the books, I thought they would make a great gift for anyone who has a creative bent or who likes to journal. I love them and know I will use mine, but I also think they would particularly appeal to the preteen and teen population. The book alone would make a great gift but you could add on one of the My Crush Assortments which have cool journaling spots, envelopes, and sticker sheets. The My Crush Besties and Best Day Assortments match well with Modville while the My Crush Memories and Favorites match well with Bluebird, but you could always mix it up.
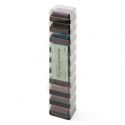
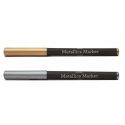
You could also add the Small Assortment of Flip Flaps to have an interactive element and they fit the My Crush Assortments! Washi tape would be a perfect complement to these books as well. Then, if you'd like to put together a really super gift, add the set of Metallic Markers and you are all set!
Click through the following links to come up with your perfect gift collection!
Labels:
My Crush
Friday, August 23, 2013
Tommy Thank Yous and Journaling Cards
Today is the final day of my, "Use up all of my Tommy Paper Pack," challenge! So, by now, I was down to smaller scraps. I decided to add a piece of retired gray cardstock, which I should use up anyway, right? I made two standard card bases from it and cut out some shapes with my Cricut Art Philosophy cartridge to match a stamp I wanted to use from the D1542, For a Friend, stamp set. Using my leftover scraps, here's what I came up with. Since the fronts of these cards are relatively light, I kept the insides blank.
Well, then I still had some scraps so I made some journaling cards which I could possibly add to
my Project Life Style Album or to one of the layouts I made with Tommy.
So I got quite a few projects done with one paper pack! I only added two full 12" x 12" sheets of cardstock (Grey Flannel and Slate) and one White Daisy card base plus White Daisy scraps and Colonial White craps. After making all of the projects I shared with you this week, I am left with just the few scraps pictured here. For reference, that striped square piece measures 1.5" x 1.5."
Not bad, don't you think? Of course, when I finished, my daughter asked, "Do you have any more of that red anchor paper?" Sigh!
I imagine I could probably get another card or journaling spot out of these scraps but I'm content with filing away the larger pieces in my scrap drawers and recycling the smaller pieces for now.
I hope you enjoyed my challenge and seeing what I could come up with.
Pin It
Labels:
cards,
For a Friend,
Tommy
Thursday, August 22, 2013
Tommy Layout from Cherish
We are on Day 5 of my, "Use up all of my Tommy Paper Pack," project!
For this double scrapbook layout, I used the pattern called Portrait Collection on page 76 in Cherish. Cherish contains 50 double layouts and comes with step by step directions as well as an example of the layout. I love the examples since they sometimes show how you can modify a layout and how to add different embellishments. I have the original hardcover version but it now comes in a softcover spiral bound book which allows it to be very affordable at $14.95.
I wanted to keep the nautical theme out of these pages since I don't know what pictures I want to use on them and I stuck with mostly a blue and yellow color scheme. I added a piece of Slate cardstock as a backing and I added a few narrow strips of paper which go down vertically in between the yellow and striped paper on the left and in between the striped paper and Slate cardstock on the right. I didn't embellish much except for the, "Treasured Moments," strip I cut from one of the zip strips in this pack. Once I know which pictures I will use on these pages, I may embellish more, but for now, I kept it simple.
Both pages, side by side
Left page
Right page
This seems to be a good layout to use when you don't want to have to fuss too much! I changed the order of the papers a bit and since I already had the narrow strips of paper earlier from some other cut (two are the narrow zip strips from the tops of the papers which I usually cut off right away), I think I just used two slices of my paper trimmer to get the pieces I needed! One was for the striped paper. I then adhered one striped piece on the Honey patterned paper on the left and one on the Slate cardstock on the right. Then I cut my Outdoor Denim in half and adhered those pieces on after adding my narrow vertical strips. How easy!
Tomorrow will wrap up my Tommy challenge so be sure to come back and see my final projects!
Pin It
Wednesday, August 21, 2013
Tommy Birthday Card #3
Here's the third birthday card I made with Tommy. I decided that since I was trying to use up my whole paper pack, I should try to finish the Tommy Assortments also, and I only had two pieces left from my Assortments pack. I really like the little canvas flags and cork pieces that come in the Tommy Assortments pack. I almost thought I should hold on to them...but I was good and did not hoard them! I added a little bit of the yellow and white Baker's Twine and again, as with my first Tommy layout, I may add some Outdoor Denim or Cranberry once I get the Harvest Baker's Twine set. The sentiments are from the Card Chatter - Birthday stamp set, a set I go back to again and again.
Front of card
Inside of card (the inside really needed some heft since I had added the Tommy Assortment embellishments to the outside -- it helped the card even out a bit in weight)
Tomorrow, as I continue my, "Use up all of my Tommy Paper Pack," project, I will show you another double layout I made.
Pin It
Subscribe to:
Comments (Atom)


