
Thursday, May 27, 2010
Crop for a Cure
If you are looking for a great crop to go to, you should check out the Fredericksburg Tri Delta Alumnae Chapter's 5th Annual Crop for a Cure on Saturday, August 14th, from 8:00 a.m. until 10:00 p.m. at Holy Cross Academy located at 250 Stafford Lakes Pkwy, Fredericksburg, VA. . The crop benefit's the St. Jude Children's Research Hospital. I was a vendor last year and will be attending again this year. It was a really well run crop with a super group of crafters. If you register by the end of May, it is only $50. If you register in June, the price goes up to $55. Breakfast, lunch and dinner are included. It's a great deal and it supports a very worthy cause.Pin It


Adhesive Search
I started this post more than two months ago and life has just gotten so busy! Sorry for the gaps in post!
I've been missing my old favorite adhesive. I used to use the Duck Double Stick Adhesive and it was wonderful. For some reason, they changed it. Now, instead of coming out in a line of adhesive, it dispenses as thin strips of adhesive. You might say, "So? What's so bad about that?" Well, let me tell you! The applicator is now also slightly different and it is more difficult to tell where the adhesive is going, at least for me. This means that sometimes, I go too close to the edge and some of those little strips hang over. With the old Duck, if I accidentally went over the edge of what I was working on, there was no problem because the adhesive wouldn't stick out the side. It would just disappear (it was like magic I tell you). The adhesive only went where there was paper since it dispensed as an adhesive film. This made it great for using even on tiny little scraps of paper. Another problem with the new Duck is that whenever it falls, it just breaks apart. It takes forever to get it back together and roll it the correct way. Finally, my third disappointment is that it doesn't really stick to ribbon the way the old Duck did. With the old Duck, I didn't have to have different adhesives on hand for different basic scrapbooking and card making needs...it took care of almost everything!
So now I am trying out new adhesives. I do have the red ATG gun but it's somewhat large for me (I occasionally have trouble with my wrists). The adhesive I have for it, and I have no idea if I bought the right kind, tends to ball up sometimes too. I just use it once in awhile. I'm trying to find some sort of tape runner that is very similar to the old Duck adhesive: small, dispenses in a film (not strips or squares), an applicator that lets you easily place it where you want it to go, works well with small pieces of paper, works well with ribbon, permanent, and strong. One thing that bothered me about the old Duck was that it wasn't refillable so if I can find a tape runner that is refillable, so much the better.
I am currently trying out the Ad Tech tape runner and the Pioneer tape roller and I've been pretty happy with them. Both are often on sale at Joann.com so if there is a free shipping offer, I buy some there. The Ad Tech has the advantage of having a refill and my local Wal-Mart carries it. I had been trying out the Scotch Tape Runner which also has refills and holds a lot of adhesive but I've found that once in awhile, you have to push down very firmly which can sometimes show through onto the other (front) side and ruin what you are working on. So, I will use it in a pinch but it's not my favorite.
What adhesive do you like for your paper crafting...tape runners and others?Pin It
I've been missing my old favorite adhesive. I used to use the Duck Double Stick Adhesive and it was wonderful. For some reason, they changed it. Now, instead of coming out in a line of adhesive, it dispenses as thin strips of adhesive. You might say, "So? What's so bad about that?" Well, let me tell you! The applicator is now also slightly different and it is more difficult to tell where the adhesive is going, at least for me. This means that sometimes, I go too close to the edge and some of those little strips hang over. With the old Duck, if I accidentally went over the edge of what I was working on, there was no problem because the adhesive wouldn't stick out the side. It would just disappear (it was like magic I tell you). The adhesive only went where there was paper since it dispensed as an adhesive film. This made it great for using even on tiny little scraps of paper. Another problem with the new Duck is that whenever it falls, it just breaks apart. It takes forever to get it back together and roll it the correct way. Finally, my third disappointment is that it doesn't really stick to ribbon the way the old Duck did. With the old Duck, I didn't have to have different adhesives on hand for different basic scrapbooking and card making needs...it took care of almost everything!
So now I am trying out new adhesives. I do have the red ATG gun but it's somewhat large for me (I occasionally have trouble with my wrists). The adhesive I have for it, and I have no idea if I bought the right kind, tends to ball up sometimes too. I just use it once in awhile. I'm trying to find some sort of tape runner that is very similar to the old Duck adhesive: small, dispenses in a film (not strips or squares), an applicator that lets you easily place it where you want it to go, works well with small pieces of paper, works well with ribbon, permanent, and strong. One thing that bothered me about the old Duck was that it wasn't refillable so if I can find a tape runner that is refillable, so much the better.
I am currently trying out the Ad Tech tape runner and the Pioneer tape roller and I've been pretty happy with them. Both are often on sale at Joann.com so if there is a free shipping offer, I buy some there. The Ad Tech has the advantage of having a refill and my local Wal-Mart carries it. I had been trying out the Scotch Tape Runner which also has refills and holds a lot of adhesive but I've found that once in awhile, you have to push down very firmly which can sometimes show through onto the other (front) side and ruin what you are working on. So, I will use it in a pinch but it's not my favorite.
What adhesive do you like for your paper crafting...tape runners and others?Pin It
Thursday, March 25, 2010
Bravo
Here's a card I made for the music teacher at work. She's been with the school for 20 years!
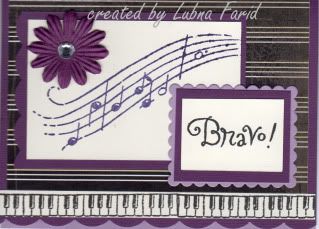

This is the front of the card.
This is the inside of the card.
Supplies Used: (C1400) Encore stamp set, (Z2105) Black stamp pad, (Z2141) Pansy Purple stamp pad, (X5669) Textured Cardstock Autumn Harvest, (Z578) Corner Rounder, (Z1104) Clear Sparkles, (retired) Just Blooms Autumn Daisy, nestabilities
Pin It
Saturday, March 20, 2010
The Nantucket Bagg
I don't know if I REALLY need it, but this bag is pretty nifty. QVC has a pretty good price but they only sell the 30 pocket tote. The company's website has the other sizes and additional colors. Temptation, temptation!
Pin It
Pin It
Thursday, March 18, 2010
Embossed Cards
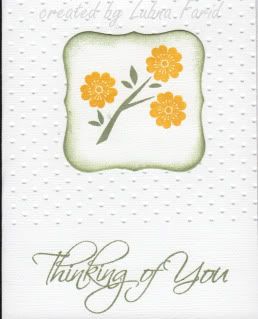
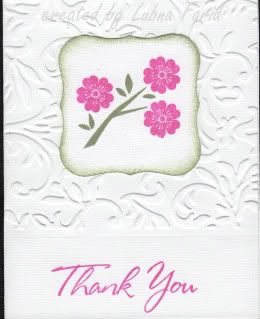
I love simple cards, but for me...they are just not always that simple to make! For example, I was inspired by this post on Ikki's Cuttlebug Cupboard. She has great tips on getting the most out of your Cuttlebug and I really wanted to try what she did with embossing the top part of a side folding standard card in portrait layout (check her blog...she has step by step pictures). I must have gone through three 12" x 12" sheets of textured white paper (aack!) before I finally got a decent card! I was trying to stamp directly onto the front of a folded card and it just wasn't working for me. Everytime I tried, I got a smudged sentiment. When I stamped before folding my card and before embossing my card, it worked much better. Anyway, here are my poor imitations of her technique and cards.
Pin It
Supplies used: (X5671) White Textured cardstock, (C1340) Aspiration stamp set, (D1187) For Every Occasion, (C1381) Card Chatter - Thank You, (Z2120) Garden green stamp pad, (Z2162) Honey stamp pad, (Z2158) Watermelon stamp pad, (Z697) Round Sponge, nestabilities, Swiss dots embossing folder, Victoria embossing folder
There's just something about embossed white paper that is so elegant and beautiful. I think if I can ever get a whole bunch of these made with different unsmudged (!) sentiments on the bottom, they would make a nice gift set.
Monday, March 15, 2010
A Week in the Life - How it Looks in the Album
This was a fun little project and it's nice that it was relatively quick. Even though the rings in the binder album are small, I think it would still fit some more pages so I'm hoping I can do this again in the future and just add the pages here. It'd be a nice way to compare how our routines change as we do.
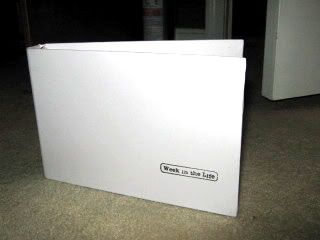
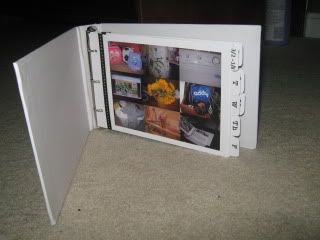
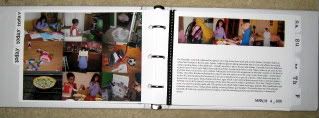
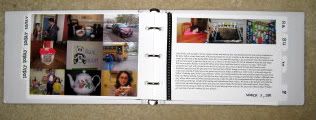
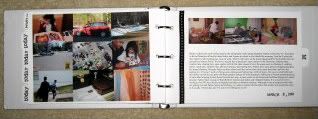
Here's a glimpse of how it looks in the album.
I stamped, "Week in the Life" from the Notice the Details stamp set, directly onto the album's cover. I just wanted to keep it simple so I didn't add any other embellishments to the cover.
The front page just has random shots from around the house (lunch boxes, the fridge, computer screen, toothbrushes, etc.)
Here are some of the layouts from inside the album. Sorry the pictures are small. When I enlarge them, they get somewhat blurry so I've kept them this size.
Supplies used: (Z1141) My Creations 3-Ring Binder, (D1378) December 2009 Stamp of the Month - Notice the Details, (D1286) Today's Date stamp set, (D1222) Tiny Typewriter Alphabet stamp set, (retired) Calendar stamp set, (1385) White Daisy cardstock, (Z2105) Black stamp pad, (Z1034) Ribbon Rounds Black Collection
Pin It
Friday, March 12, 2010
A Week in the Life - Layout
I think it definitely would have helped me to have known how I wanted to lay out my, "A Week in the Life" album in advance. It would have helped me have a better idea of how many pictures and which types of pictures I should take (I know that getting sick played a big role in the amount of pictures on certain days). Although it felt like I was taking a lot of pictures, when I do this again, I will try to take more. I will also try to journal each day instead of all at the end of the week, which is what I did this time. But I do think it all worked out pretty well.
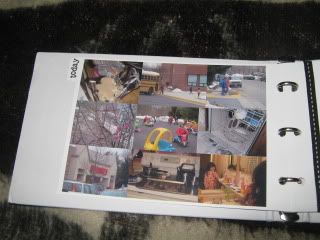
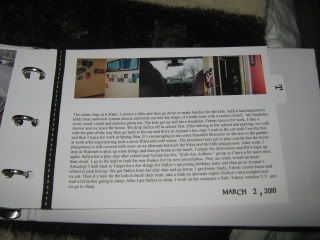
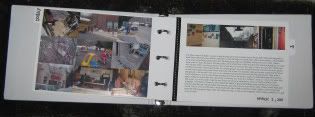
After playing around with the pictures and paper, I decided on a pretty simple layout which I hope to follow for each day. I'm using a CTMH My Creations 3-ring Binder as my album. I typed up my journaling on the computer and printed it out on White Daisy cardstock which I then cut to the same shape as the tabbed paper which comes with the binder. I'm putting my photo collage of nine pictures on the left side of each open layout and stamping the word, "today," on the tab on that page. My photo collage is slightly smaller than 5" x 7" so that there can be a bit of a border around the photos on that page. My journaling goes on the right side of the two page layout with a strip of three additional photos above it. The photos are small, approximately 1.5" x 2" each in the strip above the journaling. I will stamp a letter to indicate which day of the week it is on the tab on this page. Underneath the journaling, I will stamp the date. Then along the left side of this page, I will adhere a black ribbon with white stitching. I like the idea of using the binder because I can easily just add to the album when I repeat this project in the future and have the pages all in one place. I think it'll be interesting to compare and see how things/routines change.
Supplies used: (Z1141) My Creations 3-Ring Binder, (1385) White Daisy cardstock, (Z2105) Black stamp pad, (D1222) Tiny Typewriter Alphabet stamp set, (D1286) Today's Date stamp set, (Z1034) Ribbon Rounds Black Collection, (retired) Calendar stamp setPin It
After playing around with the pictures and paper, I decided on a pretty simple layout which I hope to follow for each day. I'm using a CTMH My Creations 3-ring Binder as my album. I typed up my journaling on the computer and printed it out on White Daisy cardstock which I then cut to the same shape as the tabbed paper which comes with the binder. I'm putting my photo collage of nine pictures on the left side of each open layout and stamping the word, "today," on the tab on that page. My photo collage is slightly smaller than 5" x 7" so that there can be a bit of a border around the photos on that page. My journaling goes on the right side of the two page layout with a strip of three additional photos above it. The photos are small, approximately 1.5" x 2" each in the strip above the journaling. I will stamp a letter to indicate which day of the week it is on the tab on this page. Underneath the journaling, I will stamp the date. Then along the left side of this page, I will adhere a black ribbon with white stitching. I like the idea of using the binder because I can easily just add to the album when I repeat this project in the future and have the pages all in one place. I think it'll be interesting to compare and see how things/routines change.
Here's the left side of the two page layout:
Here's the right side of the two page layout:
And here they are together:
Subscribe to:
Posts (Atom)






 Posts
Posts

