I was very excited to see CTMH's new jewelry options in the Autumn/Winter 2013 catalog. There are several base pieces (necklaces, headbands, rings, cuff bracelets, and clips) on which you can put whatever creation you come up with. There are also several bling options which you can add to your base pieces such as gems, word accents, and floral accents. These could also be used on your scrapbooking, card making, home décor, or other paper crafting projects just as some of the embellishments already in this and past catalogs can work to make some cool wearable jewelry.
The pink/orange circles are the strong adhesive you can use to make and affix your creations to the base pieces.
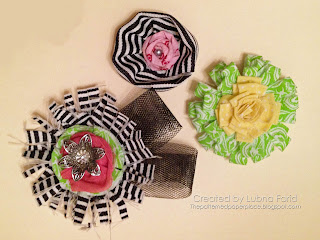
I had some time to create today and came up with a few fabric flowers to use on my jewelry. I used the Chantilly fabrics, Black Striped Grosgrain Ribbon, an Opaques gem, a new floral accent, some Black Tulle (soon to be retired!), and some old rosette ribbon in dark pink.
I used Velcro on the backs instead of the adhesive tape so I could switch out flowers if I wanted to.
I love the hair clip since it is so versatile! It can be used in your hair of course but you could also use it as a brooch, purse accent, flip flop accent, gift bag decoration, card embellishment, etc.
My daughter is wearing a fabric headband she made from an old T-shirt so she just clipped her floral piece to that. In case you're wondering, the pink in her hair is hair chalk!
There are many different ways to make fabric flowers and there are a ton of great videos on YouTube but here is a picture tutorial for the last flower pictures in my daughters hair.
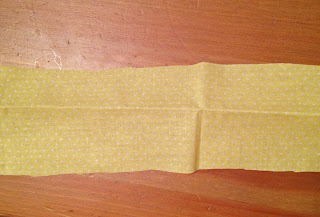
First cut a strip of fabric wide enough to fold in half. Two inches or more is a good width. This strip happened to include a fold already in it which was very helpful!
Then fold it in half.
Cut slits from the folded side so that you end up with loops. Don't cut all the way to the end. (I will need to trim the bottom of this strip a little bit.)
Start rolling your folded fabric up. While I used the adhesive tape, shown in the first picture, on most of the flowers I made here, I used a hot glue gun on this one, along the bottom to keep the fabric rolled. I will experiment with some fabric glue too to see if that works.
Keep rolling until you get to the end. If you like, repeat this with another color fabric to get a two toned flower as in the one I made above. Just glue it around your first flower.
These were a lot of fun to make!


No comments:
Post a Comment