Take a look at how to use and modify the embellishments with the Later Sk8tr digital kit.
Thursday, February 28, 2013
Wednesday, February 27, 2013
Studio J®: Focus on the Photos
If you haven't had time to take advantage of the Studio J special for February (every double layout is only $5), don't worry! This special has been extended until March 15th! I'm hoping to finish up my layouts for my 2012 family album. So glad I have more time! Here's an informative video to give you some introductory tips in case you've never tried Studio J. Remember, there's no charge to try it out! Just set up an account here and play with it!
Tuesday, February 26, 2013
Monday, February 25, 2013
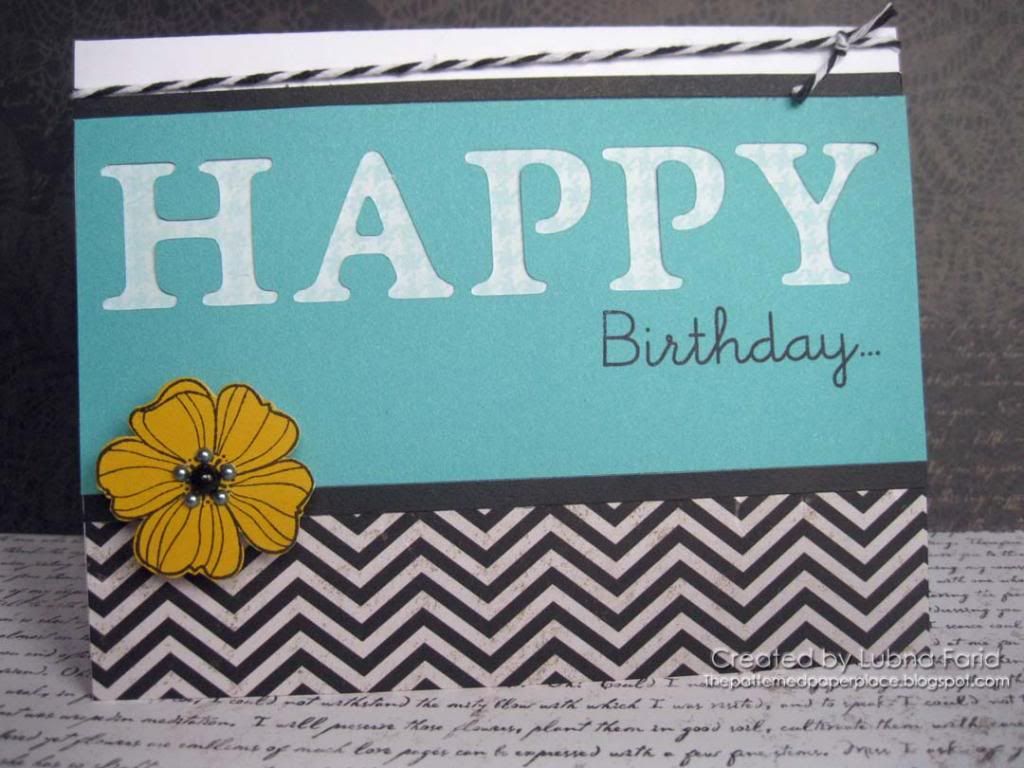
Chevron Happy Birthday
Every year, a few of my college friends and I get together and we celebrate our birthdays. We have one December birthday, two January birthdays, and one September birthday but we usually aim to meet sometime between January-March. We all have work, school, extra-curricular, and/or family obligations plus one of us drives from out of town, so you can just imagine how difficult it is to find a Saturday that accomodates all of our schedules. Well, this past Saturday was our day. We went to see a play, had dinner at a nice restaurant, and then came back here to exchange presents, have cake and do a little beading!
I opted to make the same style birthday card for each of them. I was really intrigued with this sketch from the Clean and Simple Stamping Blog.
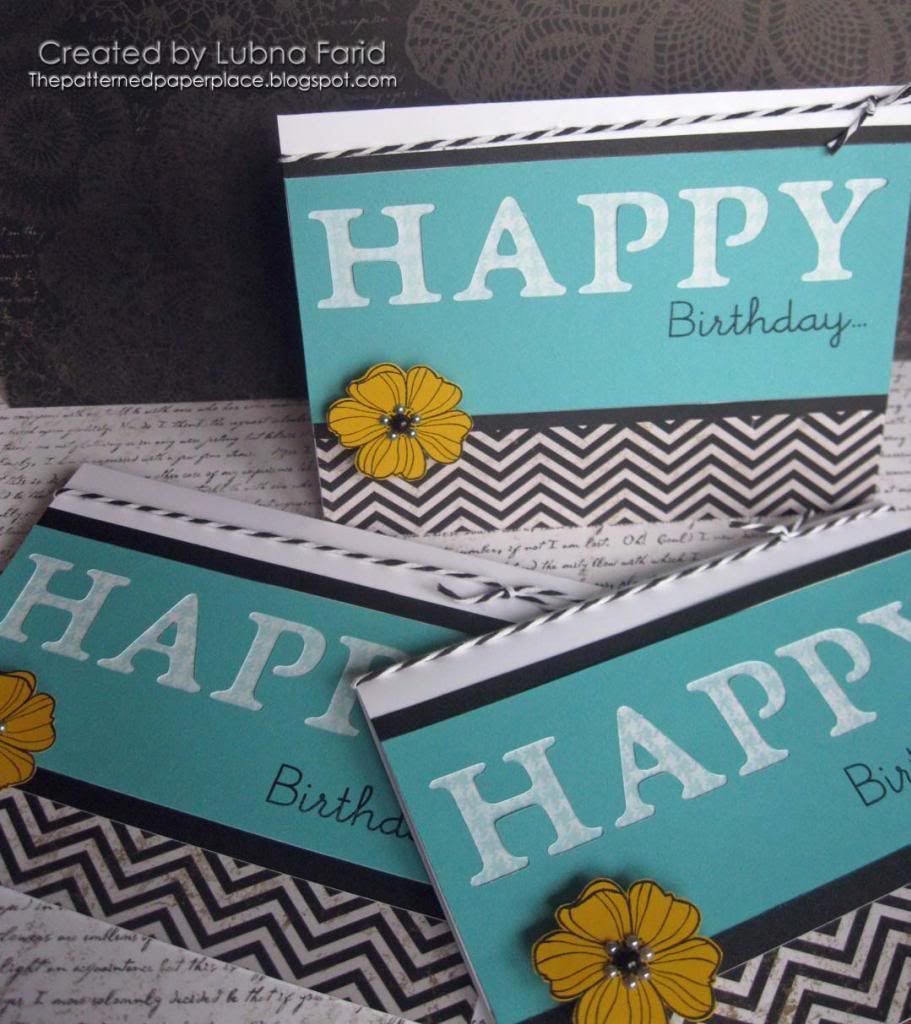
I really love the example which uses the negative space for the word and wanted to try that out. The sketch was from the 15th but I hadn't had a chance to play with it because I've had tennis elbow (from stirring sand, alum, and cornstarch together in a pot on the stove to make treasure rocks for my preschoolers -- how do I explain that to people?!) and I have had to rest my arm. But there's nothing that motivates me like a deadline so I worked on Saturday morning...yes the morning before we were to meet! I used my Cricut Art Philosophy cartridge to make quick work of cutting the letters out of my Lagoon (teal) cardstock and got three panels with the word, "HAPPY," cut out of them, lickedy-split! It's difficult to see but the paper backing the, "HAPPY," panel is a lighter blue houndstooth pattern from a long retired CTMH paper called Splendor. I added the little flower from the Card word Puzzle set stamped on honey for a little pop (and I popped it up with foam tape)!
Supplies Used (All CTMH)--
Patterned Paper: For Always (love that chevron pattern) and a scrap of blue houndstooth from the retired set called Splendor (used behind the HAPPY)
Cardstock: Lagoon, Honey, White Daisy, Black
Stamp pad: Archival Black
Stamp sets: Card Word Puzzle and Card Chatter-Birthday (I cut Birthday... off of the rest of it's sentiment-you could just mask it too)
Embellishments: Baker's Twine Neutral Assortment, Opaques Licorice Adhesive Gems, foam tape
I have also been wanting to play along with the Heart2Heart challenges but my arm has been bugging me too much. I was so happy to see that this week's chalenge is for CAS-Clean and Simple. Yay! So I'm linking this post up to this week's challenge at H2H.
Wednesday, February 13, 2013
Valentine's with Cricut Artiste
I feel like I have only barely touched the surface when it comes to using my Cricut Artiste cartridge. There is just SO MUCH on that cartridge. There are a ton of cuts you can use for Valentines alone! I did not even use them all but I wanted to show you what I've been doing these past few days.
My first card was very easy and I decided to leave the front of my card almost completely unadorned because the Chantilly paper is so beautiful. I only added a little heart.
Th real treat comes when you open it up and see the cool pop-up! The Cricut Artiste makes this so easy. To get a layered look, I just cut out the same cut twice, once in Ruby and once in Creme Brulee, then I cut the letters and scallops off of the Ruby to layer over the Creme Brulee (and I added a heart, of course). You can embellish more and get a really intricate card but I left it as is.
I cut out a number of the next card for my students using Blush and Cranberry (not pictured here). It was quick and easy. Since I had to make multiples, it was so nice that I could cut them with the Cricut. If you cut them out at 3" or less it can make a cute little gift tag.
I actually did need a gift tag so I cut a different heart card out at 2 inches and just layered different hearts, scalloped and regular, on top of it for interest. Again, it was quick and easy and I used the Artiste for all of the cuts.
As you can imagine, I had a bunch of little hearts left over from the negative spaces of my second card. I folded some of them in half and adhered them to other cards cut out with the Artiste. Here's the first one. I love the scalloped pattern with the pin holes on the bottom edge of this base card. I kept it simple. I might still add a sentiment but I wanted to get it posted!
Here's the second one with a bit more embellishing. The card base is also cut with the Artiste. The stem is cut with the Cricut Art Philosophy cartridge.
Here's a look at the inside, another pop-up but I sized it smaller this time for interest and variety.
These were all so much fun to make plus they were quite easy and quick thanks to the Artiste cartridge! AND...there are still more heart, love, and Valentine themed cuts on the cartridge!
I wish you and yours a very Happy Valentine's Day!
Pin It
Sunday, February 10, 2013
Gifts: Homemade Sugar Scrubs
In December, my daughter and I worked on some handmade/homemade gifts for her teachers, Girl Scout leaders, and some friends. The classes were collecting money to give the teachers gift cards (it's three classes which are team taught) but she also wanted to give something from herself to make it a bit more personal.
We found some recipes for sugar scrubs online and tweaked them to fit what we had and could get. There are so many recipes online but here's a link to get you started: http://dearcrissy.com/homemade-sugar-scrub-recipes/
Here's what we used:
1 cup of brown sugar
1 cup of white sugar
1/4 cup of coconut oil (this is a solid oil)
1-2 tsp. of almond extract
1 tablespoon of Vitamin E oil
We also added a bit of grapeseed oil (just eyeballed it)
We also added a bit of grapeseed oil (just eyeballed it)
We found all of these ingredients at Target. You can substitute different oils though and tweak the ingredients to make it your own. The almond extract made it smell really nice but you could substitute with whichever fragrance you prefer.
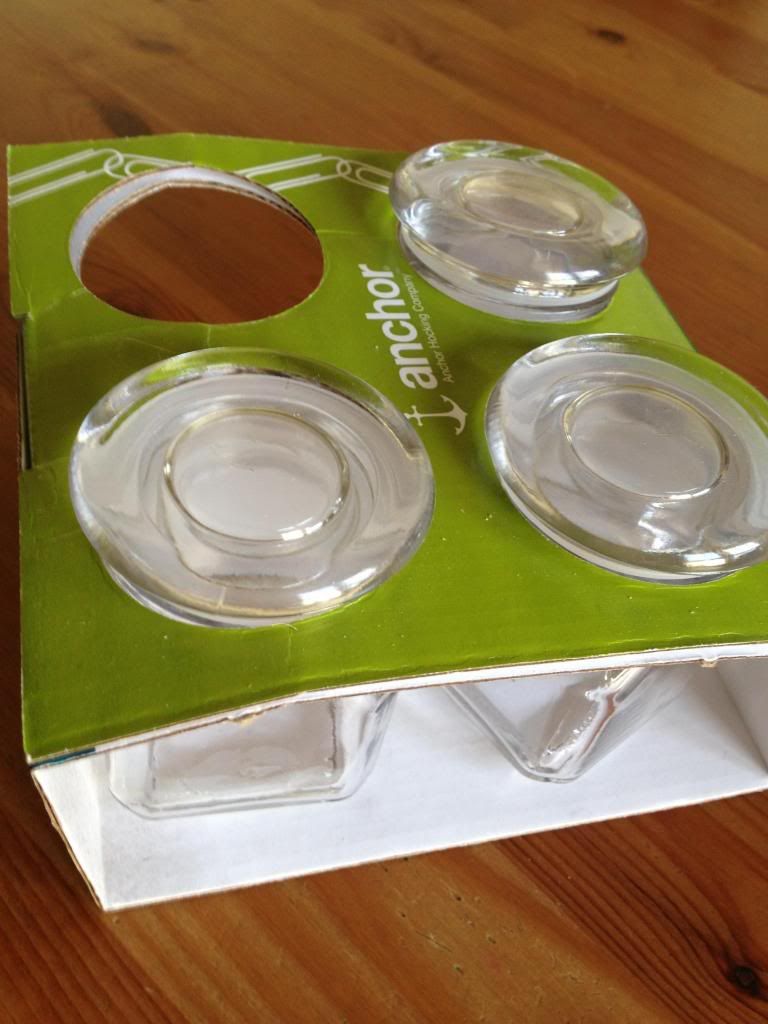
I found these little glass jars at Walmart.
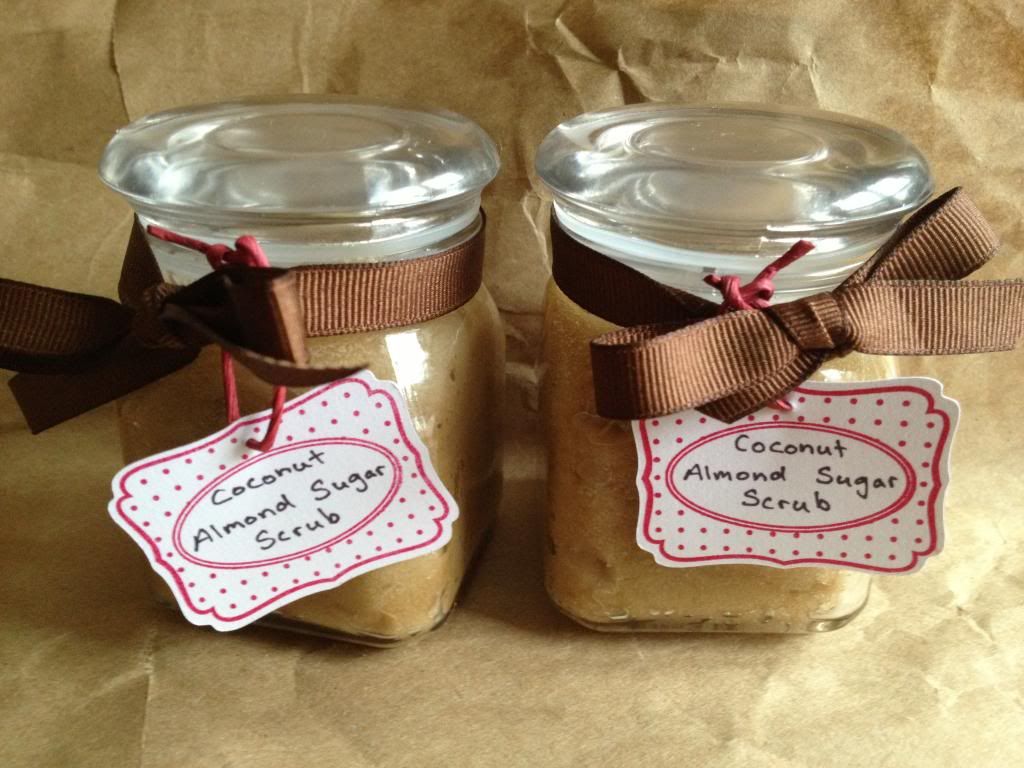
So we filled them up, cut out some tags with the Cricut Art Philosophy cartridge and stamped them using the (B1399) Crafed with Love Stamp Set.
This was what our final creation looked like:
It was simple and fun. We each also kept a little jar for ourselves!
I put a little note on the back of the tag saying this was best for hands and feet. I keep a jar in the shower and use it on my arms and legs too (it's great for winter dryness). I would avoid the face unless you've used coconut oil on your face before without any problems.
Wouldn't these make a great little Valentine's Day gift?
Pin It
Saturday, February 9, 2013
Project Inspirations: Mini Album
I love this project which uses cuts from the Cricut Artiste! It's a great way to use up some extra scraps you might have laying around and I think it would make a cool gift, especially if you have any preteen or teen girls in your life. The ones I know seem to love journals! Of course you can always make a masculine version too!
Pin It
Pin It
Labels:
Cricut Artiste,
scraps,
Twine,
Video
Thursday, February 7, 2013
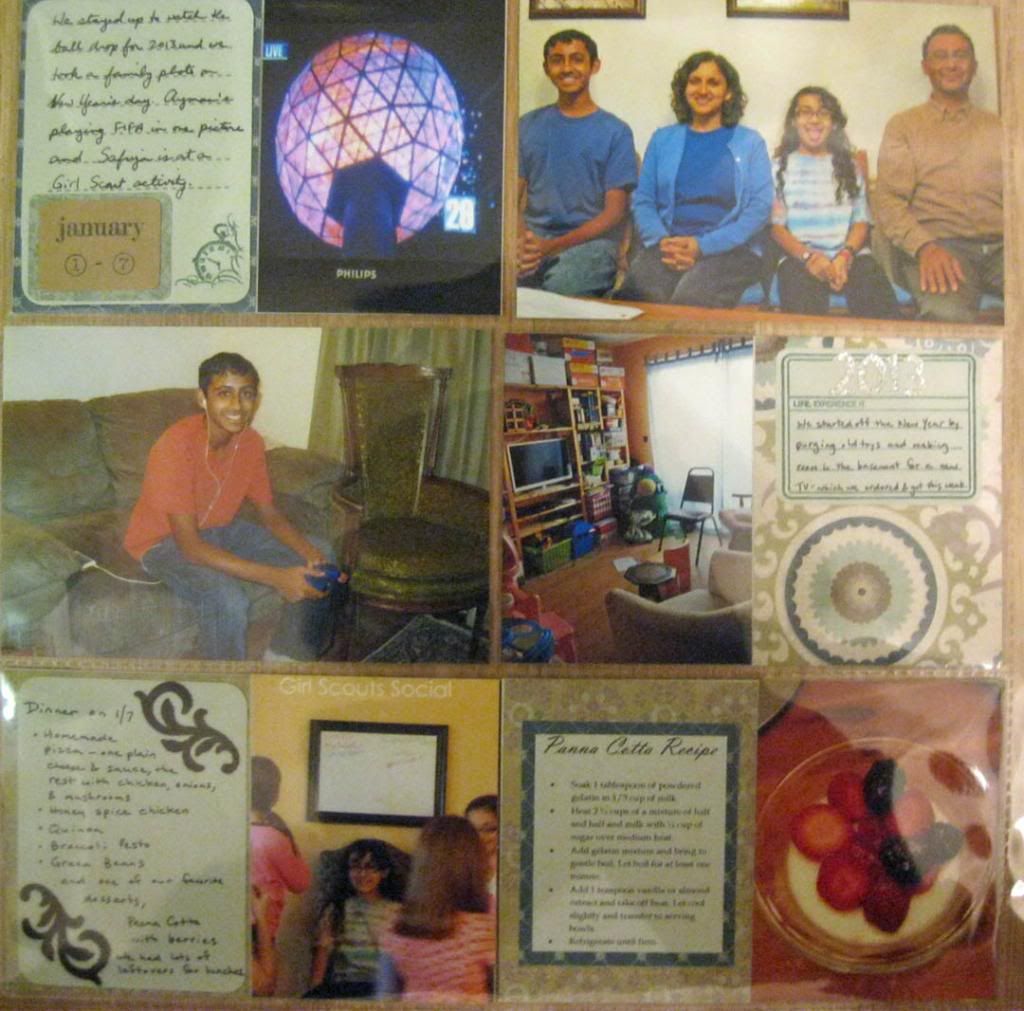
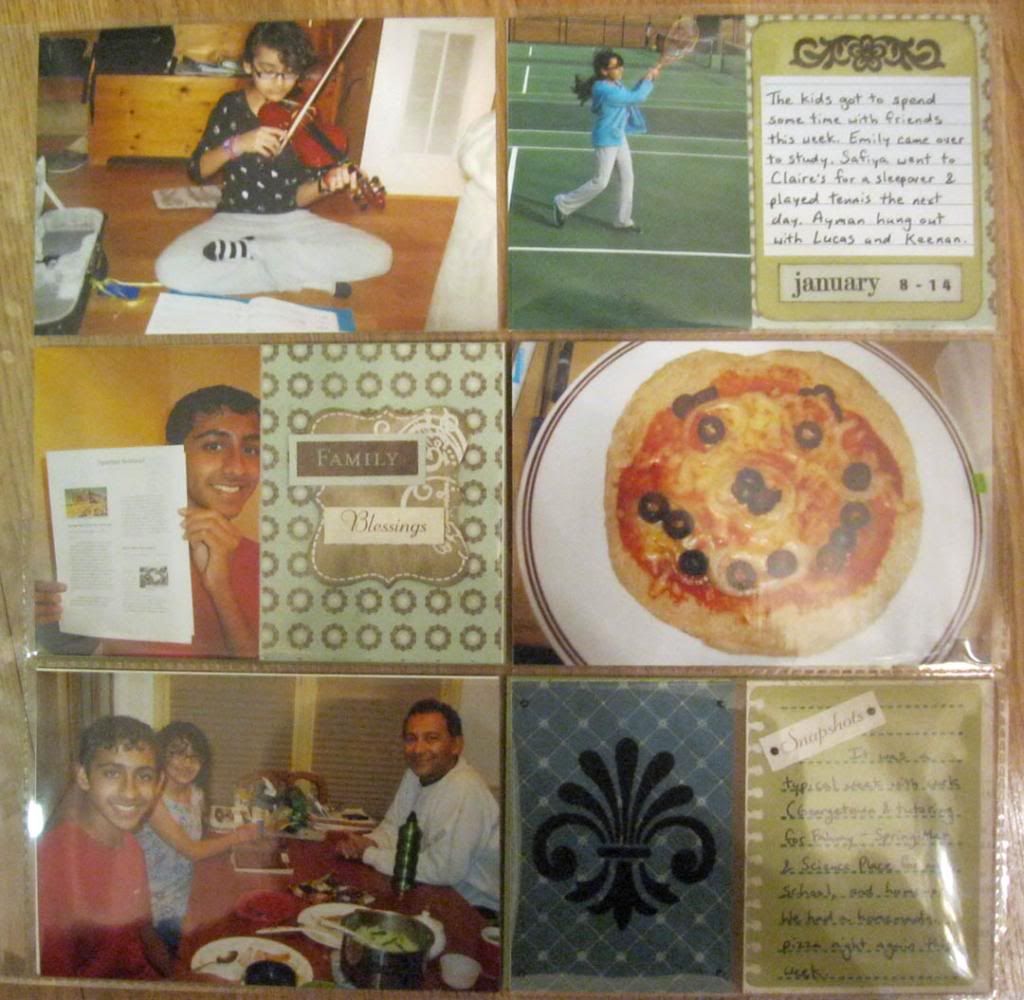
Project Life CTMH Style Weeks 1 and 2
I thought I'd show you my first and second weeks' layouts for my 2013 Project Life, CTMH Style album. They are actually in one double page layout with the first week being on the left side and the second week being on the right side. I will stay flexible and see week by week how many pictures I have and then determine if I will have a double layout for one week or for two.
You might remember my pictures for my Avonlea journaling cards from this post. I changed them a bit and cut some in half to fit with my pictures and here's what I came up with.
Left Side
Right Side
Sorry for the glare but I wanted you to see how they look in the pocket page protectors. I'm using Close To My Heart's Horizontal Photo Storage Pages.
Monday, February 4, 2013
Paper Panic Giveaway
Would you like to win one of 20 paper packs from Close To My Heart? All you have to do is make a comment before February 28, 2013 on Jeannette Lynton's blog, The Close To My Heart Facebook page, or the Close To My Heart You Tube channel or video post stating which of the new paper packs from the 2013 Close To My Heart Spring/Summer Idea Book is your favorite. Remember, don't post here! Make your comment on one of the sites I mention above. Simply click on the one you want to go to and you should be taken to the right place!
Pin It
Labels:
Video
Subscribe to:
Comments (Atom)


