Showing posts with label Cricut Artiste. Show all posts

Thursday, August 4, 2016

Happy Times Happy Birthday

One of the things I'm most excited about in the new CTMH catalog are the half size page protectors (6 x 12 vs. 12 x 12). I like to scrapbook a lot of pictures of an event onto a two page layout. I either will add a whole other layout or I'll use Flip Flaps to add more photos. Being able to simply include a half page of extra photos gives even more versatility and I am over the moon to have this option. I'm calling them half page pocket protectors but officially they are Memory Protectors™ Pocket Plus™  and you can find them here. There are a variety so you can choose whether you want to include 4 x 6 photos in a portrait or landscape orientation OR if you want to include 3 x 4 photos in either orientation. Love them!

I used Memory Protectors™ Pocket Plus™ Design 1 and here's the product description from the website: 
Add extra photos or artwork to your layouts with these Memory Protectors™, which feature a full gutter so they lie flat in post-bound albums.
10 protectors – 6" × 12" with 3 horizontal 4" × 6" pockets.

You saw that about the full gutter, right? Wahoo! You can use the in post bound albums, no problem!

So of course the first thing I created when I got my order of new stuff was a double page scrapbook layout with a 6 x 12 page protector in the middle.

Here's the left side of my double layout. The balloons and "Happy Birthday," are cut with the CTMH Artiste Cricut cartridge and the tag is from Art Philosophy, both now retired. I used the Happy Times paper pack which was a special in May. Do you see the hinges on the side of the paper mat? Aren't you proud of me for using them? Those are really old!

I included some envelopes, cards, and stickers from the retired My Crush In the Pink Assortment on the right side of my double page layout. 

Here are both pages with the 6" x 12" page protector in the middle. 

Another view with both pages and the half sized page protector flipped over. I love being able to include more pictures in my layouts without crowding them in.


 So you can probably tell that I tried to really incorporate some of the NUMEROUS embellishments which I already own. I've been organizing this summer and even though I'm not finished with my scrapbook organization, it's so much easier to see what I have and can use. Does anyone remember brads? I have so many! And so many flowers! Here's a close-up of some of the details on the first page.

Even though I used a lot of older supplies which weren't all in one coordinated set, I think they meshed pretty well. Let me know what you think!
Pin It

Sunday, May 10, 2015

Taste of Summer Mother's Day Tri-Fold Card

Happy Mother's Day to all the moms out there! 

I'm sharing the card I made for my mom using the Taste of Summer paper pack and stamp set, only available during the month of May in honor of National Scrapbooking month. I love Tri-Fold Shutter cards because you can really embellish and make them pop!

Here's how it looks closed. I cut out the "m's" and circles using my CTMH Art Philosophy Cricut Cartridge. I used Juniper and Cranberry inks to stamp my strawberries and sentiments.

When you open it, you can see all the panels. I used the CTMH Artiste Cricut Cartridge to cut my little label where I stamped "Happy Mother's Day" (from the Just To Say Cricut Collection stamp set).

You can see some more of the dimension in this view.

And here's one more open view as it's standing up. The red ribbon is our retired grosgrain Cranberry ribbon and the red cardstock is the Cranberry from the Paper Fundamentals Adventure Assortment. The base of my card is a sheet of Smoothie cardstock.

You can do a Google search for a Tri-fold Shutter card but the measurements I used for my card base are 12" x 5.5" and I scored lines using my scoring blade in my paper trimmer at 2", 4", 8", and 10" as I held the paper horizontally. I cut from 1.5" measuring down from the top edge and up from the bottom edge going from the 2" mark to the 10" mark. I liked this video on YouTube to get a better idea of how to make this: https://www.youtube.com/watch?v=oeaG4wvdZbw
Here's another video I looked at: https://www.youtube.com/watch?v=LWrnqMoaCnQ
Pin It

Thursday, February 12, 2015

Another Valentine's Day Card using Artiste and Art Philosophy

I actually made the front of this card and send it out today! That never happens with me. It should arrive on time. Woohoo! I even included some cute heart shaped sugar cookies. I hope my friend likes her package. Cricut made it easy once again. I just cut out a bunch of banner shapes and used what seemed to look good together. The inside is the same pop up heart I used earlier here.

Pin It

Monday, February 2, 2015

Valentine's Pop-Up with Artfully Sent

My mom is so timely about sending cards out for every occasion. Unfortunately, I didn't inherit that gene! Now that I make cards you'd think I would be better...but I stress over whether or not the intended receiver will like a certain design or color or whatever and I get stuck. I am working towards having more fun with the process of creating. That's what it's about, right? I'm also trying to keep cards on hand instead of making them right when I need them. Well, I'm trying and I actually started on some Valentine's today. Of course the first one will go to my mom! I have to say, the Cricut cartridges make it so much easier and faster for me. I used Artiste and Artfully Sent...and most importantly, I had fun! I felt the same way I used to as when I was a kid making cards for my mom.


A closer view of the front of the card (I like that little envelope)...

Pin It

Tuesday, January 6, 2015

Artiste Valentine

Here's what I thought would be a simple card since the Cricut and the Artistes cartridge do most of the work. But I don't have the newest version of the Cricut. I have a Cricut Expression and haven't really tried connecting to Craft Room or Design Space or whatever and I just take guesses at sizes sometime! So it took me a few tries to get a reasonable sized card. 

This is the card when it's all opened up. The hearts have slits which fit together. I also put my paper the "wrong" way on my Cricut sheet because I wanted the pattern to show differently. I ended up using the red pattern which I originally wanted on the outside to be on the inside! Then I added scraps to the outside to make the red pattern go the way I wanted. I'll probably spruce up the inside too!
 Here's the card folded up.
 And a side view...
 ...and all of my tries from Lilliputian to somewhat normal sized. The little ones are cute though. I'll probably use them for something!

Pin It

Sunday, January 4, 2015

Treasures of the Heart

The little envelope which says, "Treasures from the Heart," is from the My Crush™ Besties Assortment, a collection of journaling cards, stickers, and mini envelopes that go well with the My Crush books but, as you see here, can go on any paper crafted product you like! I used one on my card that I posted yesterday. I used the Artiste Cricut cartridge to cut out the card and the hearts from the Heartstrings papers and the Art Philosophy cartridge to cut out the roses. I also included a little puffy heart sticker from the Chalk It Up Assortment.


 Here's the card opened. I added the teal paper to the square side. I think I will add a light colored piece of cardstock or other journaling card to write a message on.

Pin It

Saturday, January 3, 2015

3-D Flower All Occasion Card

Here's an all-occasion card I made using the Art Philosophy Cricut cartridge, the Artiste Cricut cartridge and a variety of papers including our new Heartstrings, Brushed, and the retired Babycakes, as well as a journaling card (the yellow diagonal striped part) from the My Crush™ Besties Assortment. I'm learning to mix and match!


Pin It

Thursday, December 19, 2013

Clearly The Best: Swirlin' Shapes (S02E10)

Pin It

Friday, November 15, 2013

Artbooking Made Easy: Cross-Cartridge Collaboration (S01E11)

Here are some more great ideas for using the Cricut Artbooking cartridge and on combining cuts from Art Philosophy, Artiste, and Artbooking.
Pin It

Sunday, November 10, 2013

Clearly the Best: Wacky Washi (S02E04)

This is a fun technique using Washi tape in the negative space of a cut out design. What a quick and pretty card!

Pin It

Monday, September 16, 2013

Hedgehog Birthday - Paper Players Challenge #163

I received my new "You Are My Happy," stamp set in the mail on Saturday (the special for this month) and I couldn't wait to play with my favorite image from the set, that cute little hedgehog! Here's an image of the sheet (1 of 3) with the hedgehog on it and the birthday cake too which I also used.
Every year, at the beginning of the school year, I think that it would be a good idea to make up a bunch of birthday cards to send out to my preschool students when their birthday rolls around. I often get started with two or three but never make enough of them for the whole class and then am left scrambling to make something at the last minute. Last school year, I did not even get to making a single one. This year, I've been motivated by that sweet hedgehog! Well, I'm not completely done...because this year I have two classes! But I do have a good head start! And before you think that I'm crazy to try this, you should know that our class sizes are small. I have eight in each class. That's manageable, right?
 
 
I decided to do some paper piecing on the hedgehog and the cake images.
So this...
 ...became this!
 And this...
 ...became this!
 
I also used the Surf's Up paper pack, Aqua Dots, my Nestabilities circle dies, and the Holiday Tags stamp set (I cut the tags out with the Cricut Artiste cartridge) and came up with this card design.
 
So do you think I can make ten (and a half!) more? Wish me luck!
 
Pin It
Tuesday, August 20, 2013

Tommy Birthday Card #2

The following Tommy birthday card is very similar to the one I posted yesterday in that I used the same stamps sets from the Cricut Artiste bundle. I added a candle from that stamp set this time and a sentiment from a different stamp set, Card Chatter - Birthday, to the inside of the card. I also used pattern 20, on page 42, from Make it From Your Heart, Volume 1.
 
Front of card
 
 Inside of card
 
As I mentioned in my first post of this series, Tommy came out in the Spring/Summer 2013 Idea Book so it is on it's second run in the current catalog. That means it will only be available while the Autumn/Winter 2013 Idea Book is valid, until the end of January 2014. If you're interested in it, you might actually want to purchase it before January though. I know some papers which were not being sold anymore after July, like Later Sk8tr, sold out before July was even over!
 
Come back tomorrow for the continuation of my, "Use up all of my Tommy Paper Pack," project!Pin It

Monday, August 19, 2013

Tommy Birthday Card #1

It seems that I am always in need of Birthday and Thank You cards, so as part of my, "Use all of my Tommy Paper Pack," project, I set out to make some cards.
 
I used D1529, the Cricut Artiste Collection Birthday stamp set to stamp the sentiment, Oh Happy Day, and the cupcake image on White Daisy scraps shaped to match, cut out with the Cricut, of course. I used colored pencils to color in my cupcake which I had stamped in both Outdoor Denim and in Cranberry (on two different shaped pieces from the Cricut Artiste). Foam tape gives both the cupcake and the sentiment some dimension without making it too bulky.
 
Front of card
 
 
Since the front of my card was heavy with layers of paper, I added some of the scraps which were left over, after I made all of my Tommy projects, to the inside of my card just to balance out the weight and to give some interest to the inside as well (and to use up my paper, yay!).
 
Inside of card 

Stay tuned for another Tommy project tomorrow!
Pin It

Friday, July 26, 2013

Free Spirit Birthday Cards

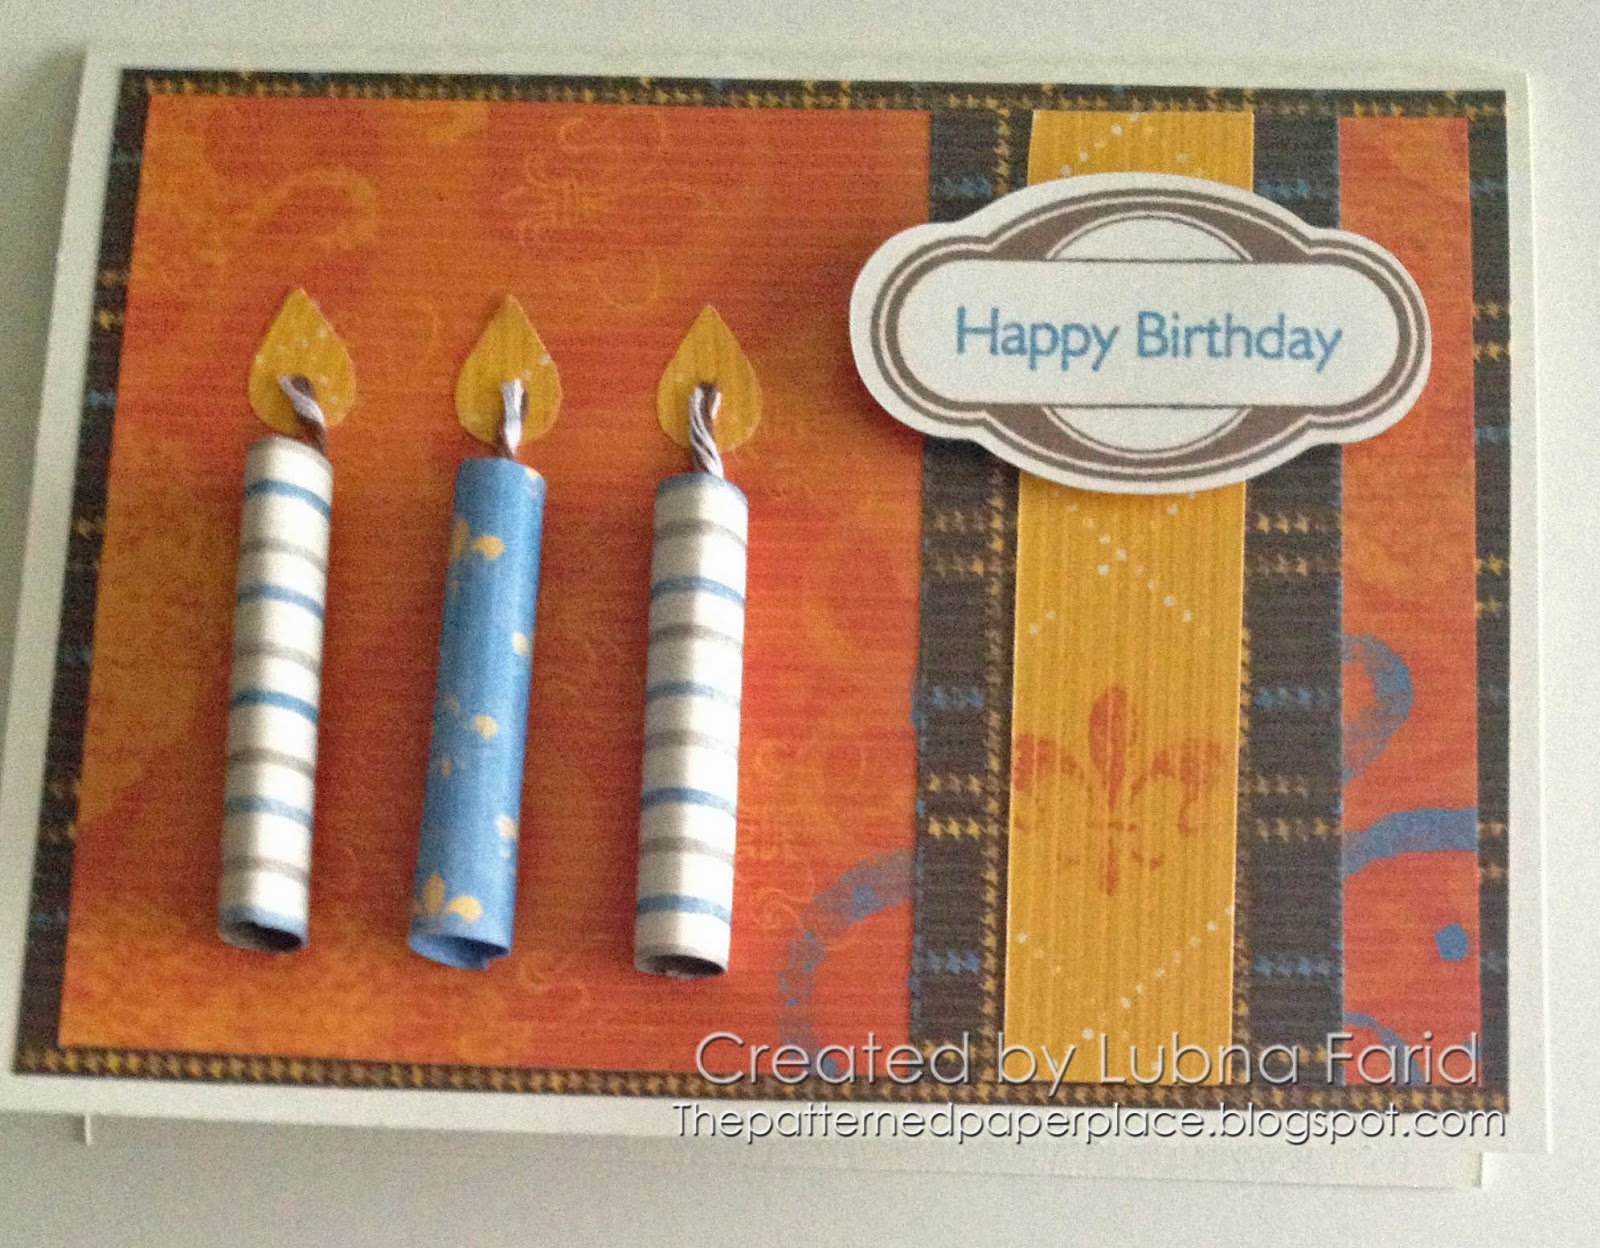
I mixed some old products (very old) and some new products for these cards. I used one of my favorite paper packs of all time, Free Spirit, and the new Holiday Tags stamp set (D1560) for the frame and sentiment. The frame is cut with the Artiste Cricut cartridge and popped up with some foam tape. I also used the Neutral Assortment of Baker's Twine and an old teardrop punch I had in my stash. I used Chocolate and Indian Corn Blue (retired) stamp pads. The rolled up candles are a good way to use up some small pieces of scrap paper. If you're sending the cards through the mail, you could keep it 2-D and use rectangular pieces of paper


Pin It

Thursday, July 25, 2013

It's a Boy!

We had some good news yesterday! My cousin had her baby! I broke out some of my new CTMH products to make a baby card. So here's a sneak peek at the new Babycakes paper pack (X7173B) and the new Wild Wonders stamp set (C1558), available on August 1st. The frame is from another new stamp set called Holiday Tags (D1560). I popped my frame up with a little foam tape. The Holiday Tags stamp set has a bunch of frames which can be cut with the Artiste Cricut Cartridge and the Wild Wonders has a giraffe and lion image which have coordinating cuts on the new Artbooking Cricut Cartridge. They were all so much fun to play with!
 
I usually don't add too much inside my cards but after looking at some examples of how other people do, I thought I might start incorporating some of my scraps on the insides. I like the weight it adds to the inside also. This way the card isn't too unbalanced. Here's what the inside looks like. I love all those floating giraffes!
 
There's an, "It's a girl!" sentiment in the Wild Wonders stamp set also. I think I could duplicate this card and leave the frame part blank or use the, "Too cute!" sentiment from the same set to have a baby card on hand for when I need one.

Some other supplies I used were the Slate and Autumn Terracotta stamp pads and the Neutral Baker's Twine Assortment.Pin It

Wednesday, April 17, 2013

Creatively Cricut

This is a great technique video! 
Discover tips and tricks for using your Cricut® machine to get the most out of your die-cutting. Stamp on Cricut®-cut pieces, change the size using special features, and more -- including how to make a full 12" border.

Pin It

Wednesday, February 13, 2013

Valentine's with Cricut Artiste

I feel like I have only barely touched the surface when it comes to using my Cricut Artiste cartridge. There is just SO MUCH on that cartridge. There are a ton of cuts you can use for Valentines alone! I did not even use them all but I wanted to show you what I've been doing these past few days.

My first card was very easy and I decided to leave the front of my card almost completely unadorned because the Chantilly paper is so beautiful. I only added a little heart.
Th real treat comes when you open it up and see the cool pop-up! The Cricut Artiste makes this so easy. To get a layered look, I just cut out the same cut twice, once in Ruby and once in Creme Brulee, then I cut the letters and scallops off of the Ruby to layer over the Creme Brulee (and I added a heart, of course). You can embellish more and get a really intricate card but I left it as is.
 
 I cut out a number of the next card for my students using Blush and Cranberry (not pictured here). It was quick and easy. Since I had to make multiples, it was so nice that I could cut them with the Cricut. If you cut them out at 3" or less it can make a cute little gift tag.
I  actually did need a gift tag so I cut a different heart card out at 2 inches and just layered different hearts, scalloped and regular, on top of it for interest. Again, it was quick and easy and I used the Artiste for all of the cuts.
As you can imagine, I had a bunch of little hearts left over from the negative spaces of my second card. I folded some of them in half and adhered them to other cards cut out with the Artiste. Here's the first one. I love the scalloped pattern with the pin holes on the bottom edge of this base card. I kept it simple. I might still add a sentiment but I wanted to get it posted!
Here's the second one with a bit more embellishing. The card base is also cut with the Artiste. The stem is cut with the Cricut Art Philosophy cartridge.
Here's a look at the inside, another pop-up but I sized it smaller this time for interest and variety.
These were all so much fun to make plus they were quite easy and quick thanks to the Artiste cartridge! AND...there are still more heart, love, and Valentine themed cuts on the cartridge!
 
I wish you and yours a very Happy Valentine's Day!
Pin It

Saturday, February 9, 2013

Project Inspirations: Mini Album

I love this project which uses cuts from the Cricut Artiste! It's a great way to use up some extra scraps you might have laying around and I think it would make a cool gift, especially if you have any preteen or teen girls in your life. The ones I know seem to love journals! Of course you can always make a masculine version too!


Pin It

Monday, January 28, 2013

Simple Sympathy Card

Here's a simple sympathy card. I used my Cricut Artiste to make the roses, a Nestabilities die to make the deckled rectangle, and the Argyle Cuttlebug embossing folder. One of my favorite elements of the card is the tiny double bow. After reading this post by Allisa Chilton, I went ahead and purchased a Bow Easy and that is what I used to help me with this bow!

Supplies Used (All CTMH except where noted)--
Cardstock: Honey, Chocolate, White Daisy, Bamboo
Stamp Set:(D476) Card Chatter - Sympathy
Embellishments: Designer Ribbon Rounds Cocoa Collection, Opaques Pearl Adhesive Gems, Liquid Glass, Nestabilities Deckled Rectangles, Cuttleug Argyle Embossing Folder
Pin It

Tuesday, January 15, 2013

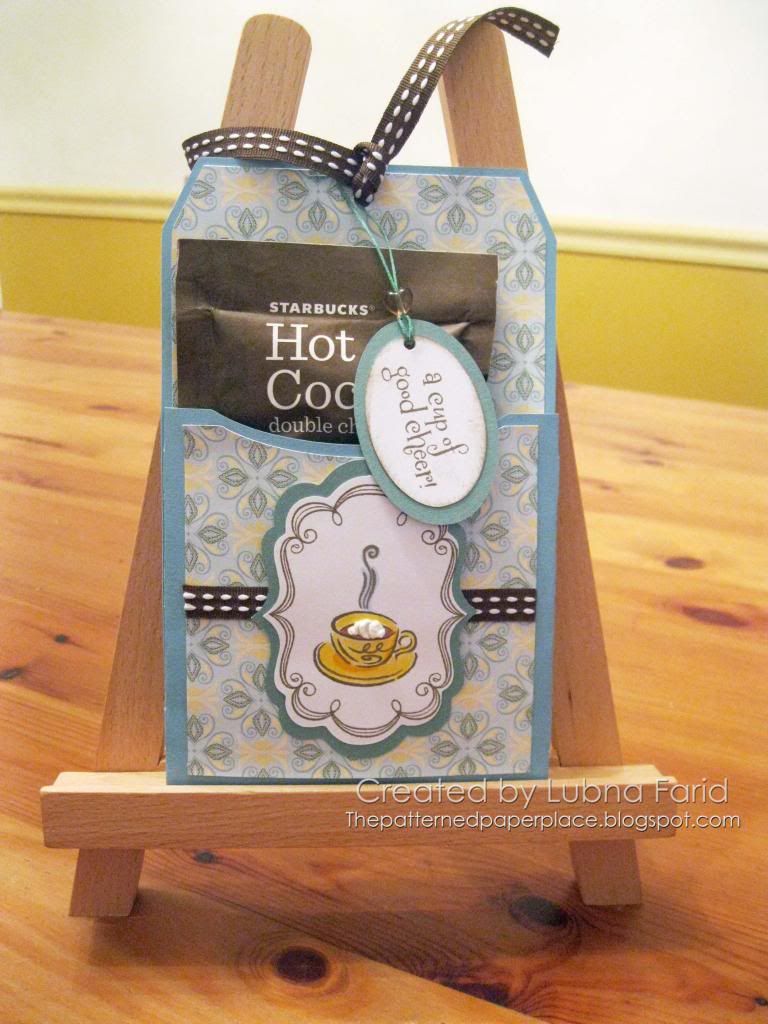
A Cup of Good Cheer

This week's Heart 2 Heart Challenge is Hot Cocoa. I took the theme literally and came up with a Hot Cocoa holder! I used my Cricut Artiste cartridge to make a library pocket (shift, card, key U). If you use "Fit To Page," the size will show up as 6" so I made a liner for it sized at 5-3/4" using the same shape. My liner sheet is another sneak peek from my favorite new paper pack, Chantilly (available on 2/1/13). The frame is a sneak peek from a new stamp set called Frame Flair.

Supplies Used (all CTMH except Copics)--
Stamp Set: (B1404) Cup of Cheer, (D1546-available 2/1/13) Frame Flair
Stamp Pad: Chocolate
Cardstock: Crystal Blue, Juniper, White Daisy
Patterned Paper: (available 2/1/13) Chantilly
 CTMH Markers (Retired): Buttercup, Sunflower
Copics: B21, E25
Embellishments: Liquid Applique, (Retired) Heart Bead, (Retired) Juniper Waxy Flax, Designer Ribbon Cocoa Collection, Cricut Artste, Cricut Art Philosophy
Pin It
Related Posts Plugin for WordPress, Blogger...