Showing posts with label cards - paper pieced. Show all posts

Sunday, January 24, 2016

All Decked Out Thanks Card

Luckily, our electricity and heat all stayed on during the blizzard so I hunkered down to make some cards...snowman themed, of course!  


As always, I am trying to use up my stash so I mixed and matched different patterned papers from Zoe (X7197B) and Georgie (X7203B), both current CTMH paper packs and from Snowhaven and Frosted, both retired paper packs. I also used the retired stamp sets, A Little Thanks and All Decked Out. The other new items I used were CTMH's Silver Foil Tape (Z3130) and some twine from the Dollar Spot at Target (which is already sold out).


I planned on making them in bulk so I went step by step. I stamped the hats on the green and white polka dotted paper from Zoe and on Cranberry cardstock so that I could have a red hat band. After cutting all of those out, I paper pieced them. Then I stamped the scarf onto the Canary cardstock, cut those out and colored some of the snowflake shapes on the scarf with the ShinHan™ Touch Twin™ Carmine Marker. That took a looong time. I stamped the snowman face and bottom on White Daisy cardstock, of course, and used the ShinHan™ Touch Twin™ Marigold Marker for the carrot nose. I cut the red Snowhaven rectangle with my paper trimmer at 1.5" x 3" and put the Silver Foil tape along the top. The gray chevron pattern is from Georgie and I used my Large Deckled Rectangles die from Nestabilities to use a background for the snowman. I used Chocolate to ink both these and the 5.25" x 4" beige Frosted background piece. As I was assembling, I was able to position the large "Thanks." and stamp in Chocolate. I loved how the red and white twine echoed the red and white in the Snowhaven rectangle and in the red on the scarf and hat of the snowman.


Whew! That's 20 cards --- which will get used up immediately!

Pin It

Thursday, June 4, 2015

A Little Treat Card - Heart 2 Heart Challenge


Since I wanted it to be a to go cup with tea, I stuck a gold sequin over the stamped coffee bean on my cup. I'll have to make another card with a coffee cup though! That little bean is so cute! I'm just loving the Treats of Friendship stamp set! I used the Paper Fundamentals Basics Assortment and the Jackson paper packet on this card. The orange chevron paper is from a piece I hoarded from Treats of Summer, the special from last month. The tea bag string is retired Colonial White Waxy Flax...remember that?
Pin It

Tuesday, May 26, 2015

retro sketches #165 with Treats of Friendship

I love tea and anything tea themed. In fact, I'm drinking some tea right now! So when I saw retro sketches #165 and the teacups were in the sketch, I was inspired to make a card. Of course, I knew I didn't have to use teacups but I just wanted to! So glad the deadline was extended! Here's the sketch:


Here's my card:
I paper pieced the teacups from Treats of Friendship with some leftover Taste of Summer papers and used the Blossom paper pack for the rest. Pacifica is the stamp pad I used for the sentiment and the black is Memento Tuxedo black. If you're looking for some great scissors for paper piecing or any fussy cutting, I highly recommend CTMH's Non-stick Micro-tip Scissors. They are wonderful!

It's been so long since I participated in a card or scrapbook challenge. I'm hoping now that school and work are winding down, I may have more time for them.


Pin It

Sunday, August 24, 2014

What a Hoot - Back to School Card

Here's a peekaboo card I made with the August Stamp of the Month, What a Hoot. It's such a cute stamp set and I decided to do some paper piecing with it.

I wanted to make a bunch of these so I worked in steps to set up all the components, assembly line style.
I used Close To My Heart's Woodgrain Embossing Folder. I actually had to spritz my Saddle cardstock with a bit of water before embossing because I had some cracking when it was just dry. I haven't have this issue with other colors of cardstock and other embossing plates from Close To My Heart but it was an easy fix and I like how it turned out. After embossing, I sponged Chocolate ink o my cardstock to highlight the texture.
I love how the Close to My Heart embossing plates are large. I can make a quick and elegant top fold card by just embossing my card front.

Next, I used my Nestabilities Circles and cut out some Pear cardstock circles.
After adhering these to the Woodgrain embossed cardstock, I cut smaller circles through both layers to create my peekaboo hole.
Here are my owl pieces. I love paper piecing since it's a good technique to use up scraps!
I ended up printing my sentiment onto Buttercup cardstock (now retired, so I'm using it up!).  I also used Buttercup as my card base. Here is most of my "assembly line," including the backing for my peekaboo circle.
The finished products!

Since I'm mailing these, I didn't want them to be too bumpy but I still wanted some dimension. I added a hole punch on either side of the sentiment and then added Liquid Glass on top to give the look of a brad. Here's a closer view.

If you're interested in purchasing, What a Hoot, it is only available in August for $17.95 or $5 with a $50 purchase. Click here to see the stamp set!


Pin It

Monday, September 16, 2013

Hedgehog Birthday - Paper Players Challenge #163

I received my new "You Are My Happy," stamp set in the mail on Saturday (the special for this month) and I couldn't wait to play with my favorite image from the set, that cute little hedgehog! Here's an image of the sheet (1 of 3) with the hedgehog on it and the birthday cake too which I also used.
Every year, at the beginning of the school year, I think that it would be a good idea to make up a bunch of birthday cards to send out to my preschool students when their birthday rolls around. I often get started with two or three but never make enough of them for the whole class and then am left scrambling to make something at the last minute. Last school year, I did not even get to making a single one. This year, I've been motivated by that sweet hedgehog! Well, I'm not completely done...because this year I have two classes! But I do have a good head start! And before you think that I'm crazy to try this, you should know that our class sizes are small. I have eight in each class. That's manageable, right?
 
 
I decided to do some paper piecing on the hedgehog and the cake images.
So this...
 ...became this!
 And this...
 ...became this!
 
I also used the Surf's Up paper pack, Aqua Dots, my Nestabilities circle dies, and the Holiday Tags stamp set (I cut the tags out with the Cricut Artiste cartridge) and came up with this card design.
 
So do you think I can make ten (and a half!) more? Wish me luck!
 
Pin It

Monday, September 2, 2013

You're the Cat's Meow!

It's been forever since I participated in a challenge and I happened to be inspired by two last night! The Papercraft Star Challenge #159 made me think of  this cute kitty cat stamp from the Cozy Cat set because of the luxurious pillow. I did some paper piecing on the kitty and pillow with the Laughing Lola and the Surf's Up paper pack. You can't see it too well in the picture but I used a bit of Silver Shimmer Trim in the collar. Sometimes fussy cutting for paper piecing is therapeutic for me! Then I used Retrosketches #79 for my layout design and made my card.


My daughter is so excited to go back to school tomorrow. This might be a nice little, "Good Luck in School," card for her to start the year off. My son is not as thrilled, but of course, he knows he will have a bigger workload being a sophomore in high school. A card might not be enough for him! Maybe a donut? ;-)Pin It

Tuesday, June 26, 2012

A Little Birdie - Retro Sketches #17

It seems that I am gravitating to sketch challenges lately! I made some more time for creating (don't worry, I did do some laundry too finally!) and based my card on Retro Sketch #17.
I pulled out my CTMH June Stamp of the Month, which I love but hadn't used yet! This is what I came up with.
The outside doesn't really make sense by itself  so here's a pic of the inside.

Supplies used (All CTMH except where noted): (S1206) A Little Birdies stamp set, (Z2105) Black stamp pad, (X7154B) Cruisin' Level 2 paper pack, (Z1701) Baker's Twine Neutral Assortment, (Z578) Corner Rounder, Spellbinders Lattice Rectangles Nestabilities, Crayola and Loew-Cornell Colored Pencils
Pin It

Sunday, January 22, 2012

Thank You Sew Much!

I had a chance to craft this weekend and came up with the following card.
Supplies used (all CTMH):
Stamp sets: (C1442) Tailor-Made, (C1494) Card Word Puzzle - new
Stamp pads: (Z2105) Black, ( 1467) Baby Pink,
Papers: (X7148B) Pemberley -- yellow piece for dressmaker form, White Daisy Cardstock, yellow and pink patterned papers (retired)
Embellishments: (Z1384) Pink Ribbon Collection, (Z1702) Baker's Twine - Paradise Assortment - new, (Z1104) Sparkles, (Z1151) Foam Tape, Yellow and pink flowers (retired), Sorbet ribbon (retired)

I was inspired by Heart 2 Heart's challenge from last week to use a CTMH stamp set you haven't used yet (the THANK YOU is from a new set but the rest is from an older set). I raided my scraps drawers and used some much older paper...yay me!
I was also inspired by the CR84FN46 Color challenge to use Light Pink, Yellow and Neutral. I am typically drawn to high contrast so it was tough for me to use these beautiful soft colors (I had to throw in a couple of medium pink accents!).


Finally I was also inspired by Challenge #18 over at Freshly Made Sketches.


In other news, I received my very own Copic markers as part of my birthday present last week from my wonderful husband! I am now the proud owner of three markers in the red family (I specifically asked for a small grouping so I could try them out without going overboard). I experimented today with an open flower stamp from the new Card Word Puzzle set and am loving them (even though I don't really know what I'm doing!). If I'm brave enough, I'll post some of my experiments! If anyone has any Copic advice for beginners, please send it my way!Pin It

Wednesday, December 28, 2011

All Decked Out - Snowman Card

I spent yesterday and today making a bunch of snowman cards using All Decked Out. It is such a fun stamp set to embellish! I thought about using different hats and scarves on each card to personalize them a bit, but in the end I decided that it would make the process faster and simpler to make them all with the same hat and the same scarf. I needed 9 cards to use as thank you cards for my students and then I wanted a few extras.

I started off by stamping a snowman with arms, a face, and snowflakes on a 3.5" x 5" piece of White Daisy cardstock. Then I repeated this about 12 more times. Sorry for the out of focus picture!

Then I stamped the hat I chose on a patterned piece of paper as well as on a solid piece of Sky cardstock multiple times. I also stamped the scarf on Sky cardstock and then I cut out the hats, hat bands, and scarves. I layered the Sky hat band onto the patterned paper hats.

Next, I "dressed" the snowmen in their hats and scarves and inked up the edges of the White Daisy cardstock pieces in Moonstruck ink. I also colored the carrot noses with an orange colored pencil.

I inked up the edges of some old patterned paper (from Twitterpated) in Moonstruck ink and attached them to card bases.Then I attached the White Daisy snowman stamped pieces to these card bases. I added some silver Glitz to some of the snowflakes and Liquid Glass to the carrot noses.

After the cards were dry, I added Sunset ink to some mini paper flowers and added mini sparkles to the middles. I added these flowers to the hats. I also added some ribbon to the card. Here is the final card.
Supplies used (all CTMH): (D1308) All Decked Out stamp set, Sky stamp pad, (Z2134) Moonstruck stamp set, (Z2124) Grey Flannel stamp pad, (Z2117) Crystal Blue Stamp pad, (Z2105) Black stamp pad, (Z2114) Cocoa stamp pad, (Z1482) Silver Glitz glitter gel, (Z679) Liquid Glass, blue ribbon, mini paper flowers, (retired) Sweet Home paper, (retired) Twitterpated paperPin It

Monday, April 11, 2011

Chairs To You!

Even though it's a bit early for me to be using it...I love May's Close to my Heart stamp of the month! Hmm, what does it say about me that the images of cozy and comfy chairs really resonates with me? When I took a look at the weekly color challenge over at http://cr84fncolorchallenge.blogspot.com/ and saw this cute card by Bianca Taylor, it inspired me to "inaugurate" my May SOTM (consultants have the chance to buy stamps of the month ahead of time).

The colors for this week are light pink, black, and cream:


Here's my card:
Supplies used: (D1456) Chairs to You - May Stamp of the Month, (X7134B) Sweetheart Level 2 paper pack, (Z2105) Black stamp pad, (Z2302) Baby Pink marker, (Z1034) Black Ribbon Rounds, (Z578) Corner Rounder, (Z1326) Red, Pink, and Purple Sparkles, (retired) Colonial White spiral clip, black gel pen

The little rosette is just Colonial White cardstock cut into a spiral shape and rolled up. I used tacky glue to make the rosette stay rolled up (but I'd bet Liquid glass would work also). I love that black ribbon with the stitch going through it and use it quite a bit. The Black Ribbon Rounds collection is on sale now through my website on the "While Supplies Last"  page. I'm trying to BE GOOD and use up my old supplies before getting new ones but I may have to break down and get this one before it sells out.Pin It

Sunday, February 21, 2010

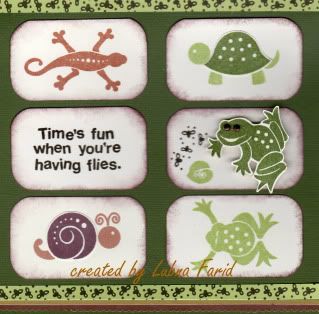
Time Flies When You're Having Fun

Well, I had my shaker card workshop yesterday and I had such a great time with the wonderful ladies who attended. It was the perfect cure for a somewhat strange week (lots of ups and downs). Anyway, I am so grateful to know such nice people and to be able to spend time with them. Thank you ladies! Time really does fly when you're having fun. This card has a slightly different take on that saying!

Supplies used: (B1309) Fun Times, (X5669) Textured Cardstock Autumn Harvest Palette, (X5643) Chocolate cardstock, (1273) Desert Sand cardstock, (1388) Colonial White cardstock, (X5639) Sweet Leaf cardstock, (Z2153) Sweet Leaf stamp pad, (Z2137) Olive stamp pad, (Z2105) Black stamp pad, (Z2108) Brown Bag stamp pad, (Z2111) Chocolate stamp pad,  (Z578) Corner Rounder, (Z1217) Brads Metal Assortment, (Z1151) 3-D Foam tape, Mini scallop scissors
Pin It

Friday, February 19, 2010

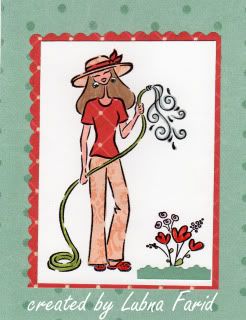
I'm Ready for Spring!

I'd love to be able to garden again. I think things around here will be very muddy for a long while after all the tremendous amount of snow melts! But this image, especially with the little sparkles for earrings, makes me happy.

Supplies used: (X7100B) Perfect Day paper pack level 2, (D1344) Ms. Gardener stamp set, (B1230) Solos "F" stamp set, (Z2366) Tulip marker, (Z2318) Desert Sand marker, (Z2324) Grey Flannel marker, (Z2342) Parchment marker, (Z2353) Sweet Leaf marker, (Z2105) Black stamp pad, (Z1104) Clear Sparkles, decorative scissors
Pin It
Related Posts Plugin for WordPress, Blogger...