Saturday, August 11, 2018

Sneak Peek - Dates to Remember stamp set


I thought I'd give you a sneak peek at one of my favorite new stamp sets from the upcoming CTMH catalog, Holiday Expressions (September-December 2018). I have been experimenting with planners and bullet journals to get organized. Currently, I use a Scribbles that Matter Dotted A5 Journal which is basically a blank book that you can customize. My brain works better when I can see a monthly view but sometimes I also need the weekly layout for added details and such so for certain weeks, I do sometimes add a weekly layout as shown below. 


Before getting this stamp set called, Dates to Remember, I would either forego having a monthly view on the same double page layout or just draw it in, which could sometimes get tedious. I thought about buying Washi tape calendars but didn't think that would work for me. I was on the verge of buying a stamp set from a different company when I saw this in our new catalog. Yay! It was the first thing on my list of must haves!


 I was a bit in a rush to stamp and used a much larger block than needed so my days of the week got a bit smudged but I just love being able to get my calendar done in seconds! I just highlight the week that the layout is for and then sometimes circle other important dates (didn't do that here) so I can get a sense of what's coming up. I'm so happy with this stamp set!


Pin It

Sunday, June 10, 2018

Beautiful Friendship Impossible Card


I've taken a looong hiatus from crafting. Not really intentionally but it had been very difficult for me to fit it in. Funny how my hiatus coincides with the school year! Anyway, I had been seeing some cool pop up style cards called, "The Impossible Card," and decided to try my hand at them. Here's a link to instructions and a good video which will show you multiple sizes:
https://www.maymaymadeit.com/blogs/news/the-impossible-card-in-multiple-sizes

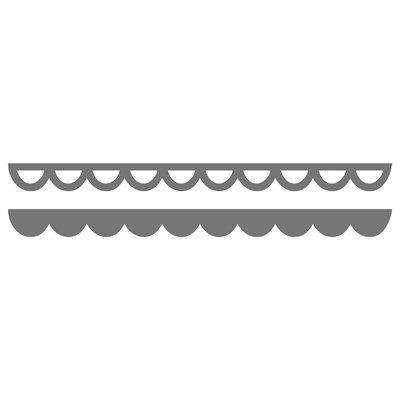
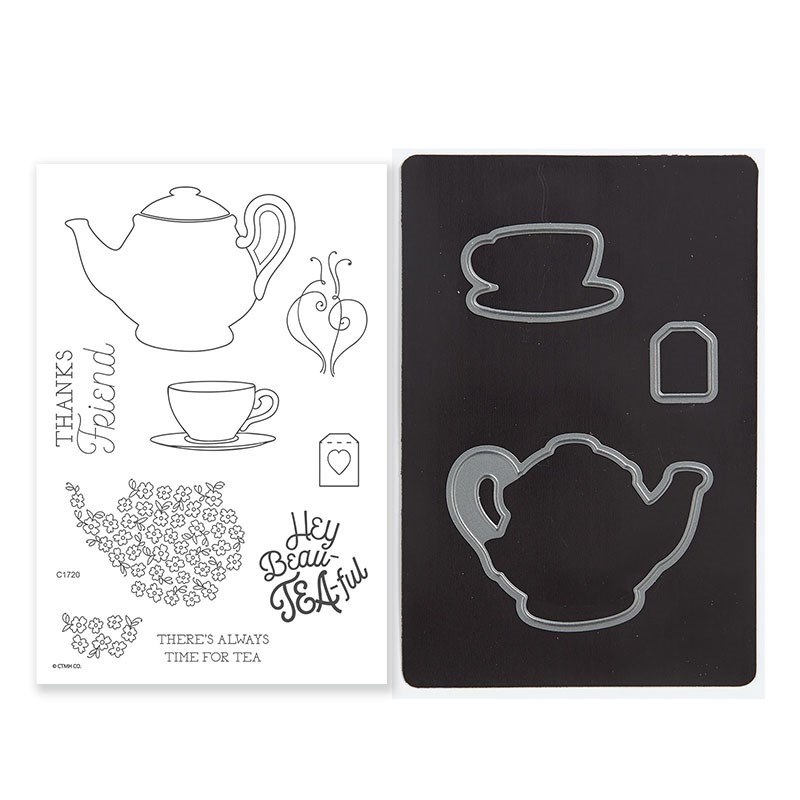
I used the retired Chelsea Gardens paper pack, simply because I like and hadn't had a chance to use it before. Sorry to use something retired! I also used the Thin Cuts Scallop Border and Beautiful Friendship-Cardmaking stamp and thin cuts set.

This card is great fun to design and play around with. I made an A2 (standard card) size. If I move my teapot down a little, it will fold flat and be able to fit in an A2 standard card envelope.

I'm going to link this up to the current challenge at Shopping Our Stash #357 - My Favourite Things,
since tea is my favorite drink and Chelsea Gardens is my favorite paper, even though it's not "current."

product image


Pin It

Tuesday, September 5, 2017

Back to School Mini Cup Gift

I've been seeing a bunch of cool crafts with these mini cups so I thought I'd try to make one. There are a variety of directions online and I decided to follow along with this one: https://dawnsstampingthoughts.net/2017/08/mini-coffee-cup-gift-card-holder-video.html

I used a slightly older stamp set (School Kids) with die cuts and the new Falling For You paper packet. I also used the Thin Cuts-Basic Tags to put the apple on.

The Goldrush cardstock with the ruler stamped on it can hold a gift card. And then the mini cup itself can be filled with all sorts of things: chocolate, jelly beans, a Keurig cup, tea bags, etc.


The video I linked has the info for the cups, but here it is again.
I got the 4 oz. cups here: https://www.webstaurantstore.com/choice-4-oz-white-poly-paper-hot-cup-pack/9994W.html
and the lids here: https://www.webstaurantstore.com/choice-4-oz-white-hot-paper-cup-travel-lid-pack/999L4W.html

Pin It

Wednesday, July 26, 2017

Panda Thank you from the Bottom of My Heart

Here's another little sneak peek! I have been waiting ages for Close To My Heart to come out with a "Panda," stamp. The panda is the mascot of the school where I work so I thought it would come in very handy for cards and such. I had almost given up hope, but in this catalog there are not only one, but two stamp sets with a panda stamp. My favorite is this one below! Yes, I only got the stamp set for one image! But I do hope to use the other stamps sometime. 😉


I worked on a little card and colored the panda with my ShinHan markers. I used foam tape to pop up a little punched heart to go with my sentiment. Bonus points if you can name the retired paper I used for the background of the card!


Pin It

Saturday, July 22, 2017

Layout Share and Sneak Peek for New Catalog

If you follow my Facebook page, you will have been seeing a lot of sneak peeks for the upcoming CTMH catalog which goes live on August 1st. I thought I would include some here as well. I made the layout below with older paper but the letters, "VCPC," are made with CTMH's new Thin Cuts (die cut) Block  Alphabet! I also used their new Gold Pearls as an accent on the journaling block and on the lower right side. 


I used foam tape to pop up the die cut letters, which you can see a bit better in this view. 


Here are the items from the new catalog that I used on the layout.

Gold Pearls (pack of 90)
The new catalog also has Bashful Pearls (pink) and White Pearls. I like using pearls as an accent on scrapbook pages since it adds dimension without too much bulk.
Thin Cuts—Block Alphabet
This will be such a helpful tool for layout titles!


Pin It

Monday, July 3, 2017

No Worries Layouts

Back in April, my daughter's Girl Scout troop took a trip to Northbay Adventure Camp and I went along for fun! I used the No Worries paper pack and Complements to scrapbook our pictures. I've been trying to think in terms of embellishment clusters so I also used my Swirly Seashells Stamp + Thin Cuts and some random Picture My Life cards that I have to add little something extra to the layouts.


Pin It

Monday, April 10, 2017

True Love Kids Thank You

My creative time has been fleeting lately so a few hours to create today was a treat. I decided to do some coloring with my ShinHan Touch Twin markers and used the ultra cute True Love stamp set along with the retired Dream Pop papers (you know I'm a hoarder, right?). The "Thanks," sentiments is from the retired Cricut Artiste Word Balloons stamp set. I like how it all came together!


Pin It

Tuesday, January 17, 2017

Prima Doll in the Snow


I used the, "Winter," thin cuts with the Black glitter paper and the "Snowflakes" die cuts with the Silver glitter paper on my latest pocket letter!


Pin It

Tuesday, January 3, 2017

You're the Sweetest Card

Happy New Year!

Have you had a chance to see the new catalog? If not, click here to view the Seasonal Expressions fro Jan-April 2017!

There are a whole slew of beautiful new papers, coordinating embellishments, and stamp sets!

The Sugar Rush designs are among my favorites! I used the Paper Pack, the Thin Cuts Bundle, and the Sugar Rush Cardmaking stamp set for this quick card.


Pin It

Sunday, November 27, 2016

Winter Themed Cards

Here's a picture of some cards I've been working on. I'm really enjoying using the Thin Cuts. I used the Cozy Christmas Thin Cuts Bundle for the snowman card and the Snowflakes Thin Cuts for the top two cards. And, of course, I'm still playing with the CTMH Cricut Flower Market cartridge (wreath card).


Pin It

Sunday, October 23, 2016

Flower Market Sunflowers

I had some fun playing with my CTMH Flower Market Cricut cartridge. I cut out a variety of sunflowers and middles, not to mention letters. I LOVE the font on this cartridge! It all worked perfectly for my layout which was about a trip this past summer to a sunflower field at a local farm. The Rustic Home Fundamentals paper pack added the perfect weathered counter balance to the cheery and bright sunflowers.


Pin It

Saturday, October 8, 2016

Keep Calm and Love Autumn PL

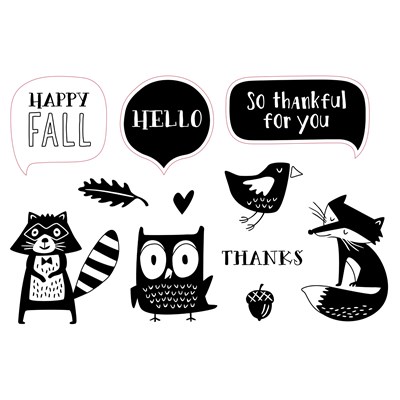
 I used the new CTMH Woodland Critters stamp set on a PL I sent to Portugal. The theme was "Keep Calm and Love Autumn!" 

product image
I also used a bunch of older CTMH supplies (felt pieces, leaves, journaling spots) and some Target Dollar Spot items (wooden tags, wooden leaves and pumpkins).

Here's the reverse side with all the treats!


Pin It

Tuesday, September 27, 2016

Fall Prima Doll Pocket Letter Swap

I am brand new to the world of Julie Nutting Prima Dolls. Yes, I know I'm late to the game! I actually only bought some to participate in this swap (Fall Prima Doll themed swap) and now I am hooked! It is so much fun to create and customize each doll. Unlike my first two pocket letters,in which I've used each pocket as a mini canvas, I decided to change it up this time and made a scene which I then cut up. I used mini velcro dots - Hook and Loop Dots - to attach the Prima Doll to the outside of my pocket letter since I really wasn't comfortable cutting it up!


Here's a view of the back of the pocket letter and all of the goodies I put in it. I just love that gold washi!


Pin It

Saturday, September 10, 2016

"Pretty Things" Pocket Letter

The pocket letter fun continues! This was made for a "Pretty Things," themed event so we could use anything. Here's the front.

 I included my letter inside of this envelope which I made with the Cricut CTMH Artbooking cartridge and teeny tiny Velcro dots.

 And here's the back!
Doing these pocket letters has helped me to explore more of the cuts on my Cricut cartridges ad there are a LOT on the CTMH ones. I get to use my extra supplies in a creative way and I've really been enjoying this process. 
Pin It

Wednesday, August 31, 2016

Tea Themed Pocket Letter

I mailed off my first pocket letter swap today so I thought I would post some pictures here. In case you are not familiar with Pocket Letters, they are typically made using trading card/baseball card page protectors which have 2.5" x 3.5" pockets and craft items, like extra scrapbooking products. Hmm, now, where would I get some of those? Janette Lane, inventor of the concept explains it here: http://janettelane.blogspot.com/2015/02/what-are-pocket-letters.htm

The swap I participated in is a tea themed swap where we had to include 9 teabags (typical pocket letters contain one) along with the other usual components of a pocket letter. Here's what I came up with.


Here's the reverse side showing all of the teas.

In between the two sides, I tried to include some goodies such as tags, die cuts, glitter, shaped paper clips, and I even had a teapot stencil that I was able to fit in.

This is how I packaged it before putting it in a 6" x 9" padded envelope. You can fit them in a regular business sized envelope if they are not too bulky but I was having fun adding layers and didn't want to worry about restricting myself for this first one!

Here are close ups of some of the pockets.


 This pocket contains an envelope which holds some paper butterflies.

Here's the front of the envelope.

And here's a view of the back.

 The tag in this pocket contains some samples of washi tape wrapped around it.

I made the pink "hello" shown on this pocket with the new CTMH Hello and Thanks thin cuts. I included a little envelope, which contains my letter to my swap partner, behind the vellum rectangle here. 

I made a couple of extra hello die cuts to include in another pocket but here's a look at it by itself. I love how these came out!

I used my CTMH Cricut Artbooking cartridge to make the envelope which holds my letter. Here's the front of it.

 Here's the back.

 Here's the back with the flap open. I included little velcro dots on the envelope flap so that it can stay shut.


I hope my swap pal likes it!
Pin It

Thursday, August 4, 2016

Happy Times Happy Birthday

One of the things I'm most excited about in the new CTMH catalog are the half size page protectors (6 x 12 vs. 12 x 12). I like to scrapbook a lot of pictures of an event onto a two page layout. I either will add a whole other layout or I'll use Flip Flaps to add more photos. Being able to simply include a half page of extra photos gives even more versatility and I am over the moon to have this option. I'm calling them half page pocket protectors but officially they are Memory Protectors™ Pocket Plus™  and you can find them here. There are a variety so you can choose whether you want to include 4 x 6 photos in a portrait or landscape orientation OR if you want to include 3 x 4 photos in either orientation. Love them!

I used Memory Protectors™ Pocket Plus™ Design 1 and here's the product description from the website: 
Add extra photos or artwork to your layouts with these Memory Protectors™, which feature a full gutter so they lie flat in post-bound albums.
10 protectors – 6" × 12" with 3 horizontal 4" × 6" pockets.

You saw that about the full gutter, right? Wahoo! You can use the in post bound albums, no problem!

So of course the first thing I created when I got my order of new stuff was a double page scrapbook layout with a 6 x 12 page protector in the middle.

Here's the left side of my double layout. The balloons and "Happy Birthday," are cut with the CTMH Artiste Cricut cartridge and the tag is from Art Philosophy, both now retired. I used the Happy Times paper pack which was a special in May. Do you see the hinges on the side of the paper mat? Aren't you proud of me for using them? Those are really old!

I included some envelopes, cards, and stickers from the retired My Crush In the Pink Assortment on the right side of my double page layout. 

Here are both pages with the 6" x 12" page protector in the middle. 

Another view with both pages and the half sized page protector flipped over. I love being able to include more pictures in my layouts without crowding them in.


 So you can probably tell that I tried to really incorporate some of the NUMEROUS embellishments which I already own. I've been organizing this summer and even though I'm not finished with my scrapbook organization, it's so much easier to see what I have and can use. Does anyone remember brads? I have so many! And so many flowers! Here's a close-up of some of the details on the first page.

Even though I used a lot of older supplies which weren't all in one coordinated set, I think they meshed pretty well. Let me know what you think!
Pin It
Related Posts Plugin for WordPress, Blogger...